
- Let’s get started
- Select account type
- Personal information
- Funding
- Identification
- Debit card
- Review
1. Let’s Get Started
The first step identifies the applicant, confirms they are eligible, and sets up their online banking access.Eligibility and Email
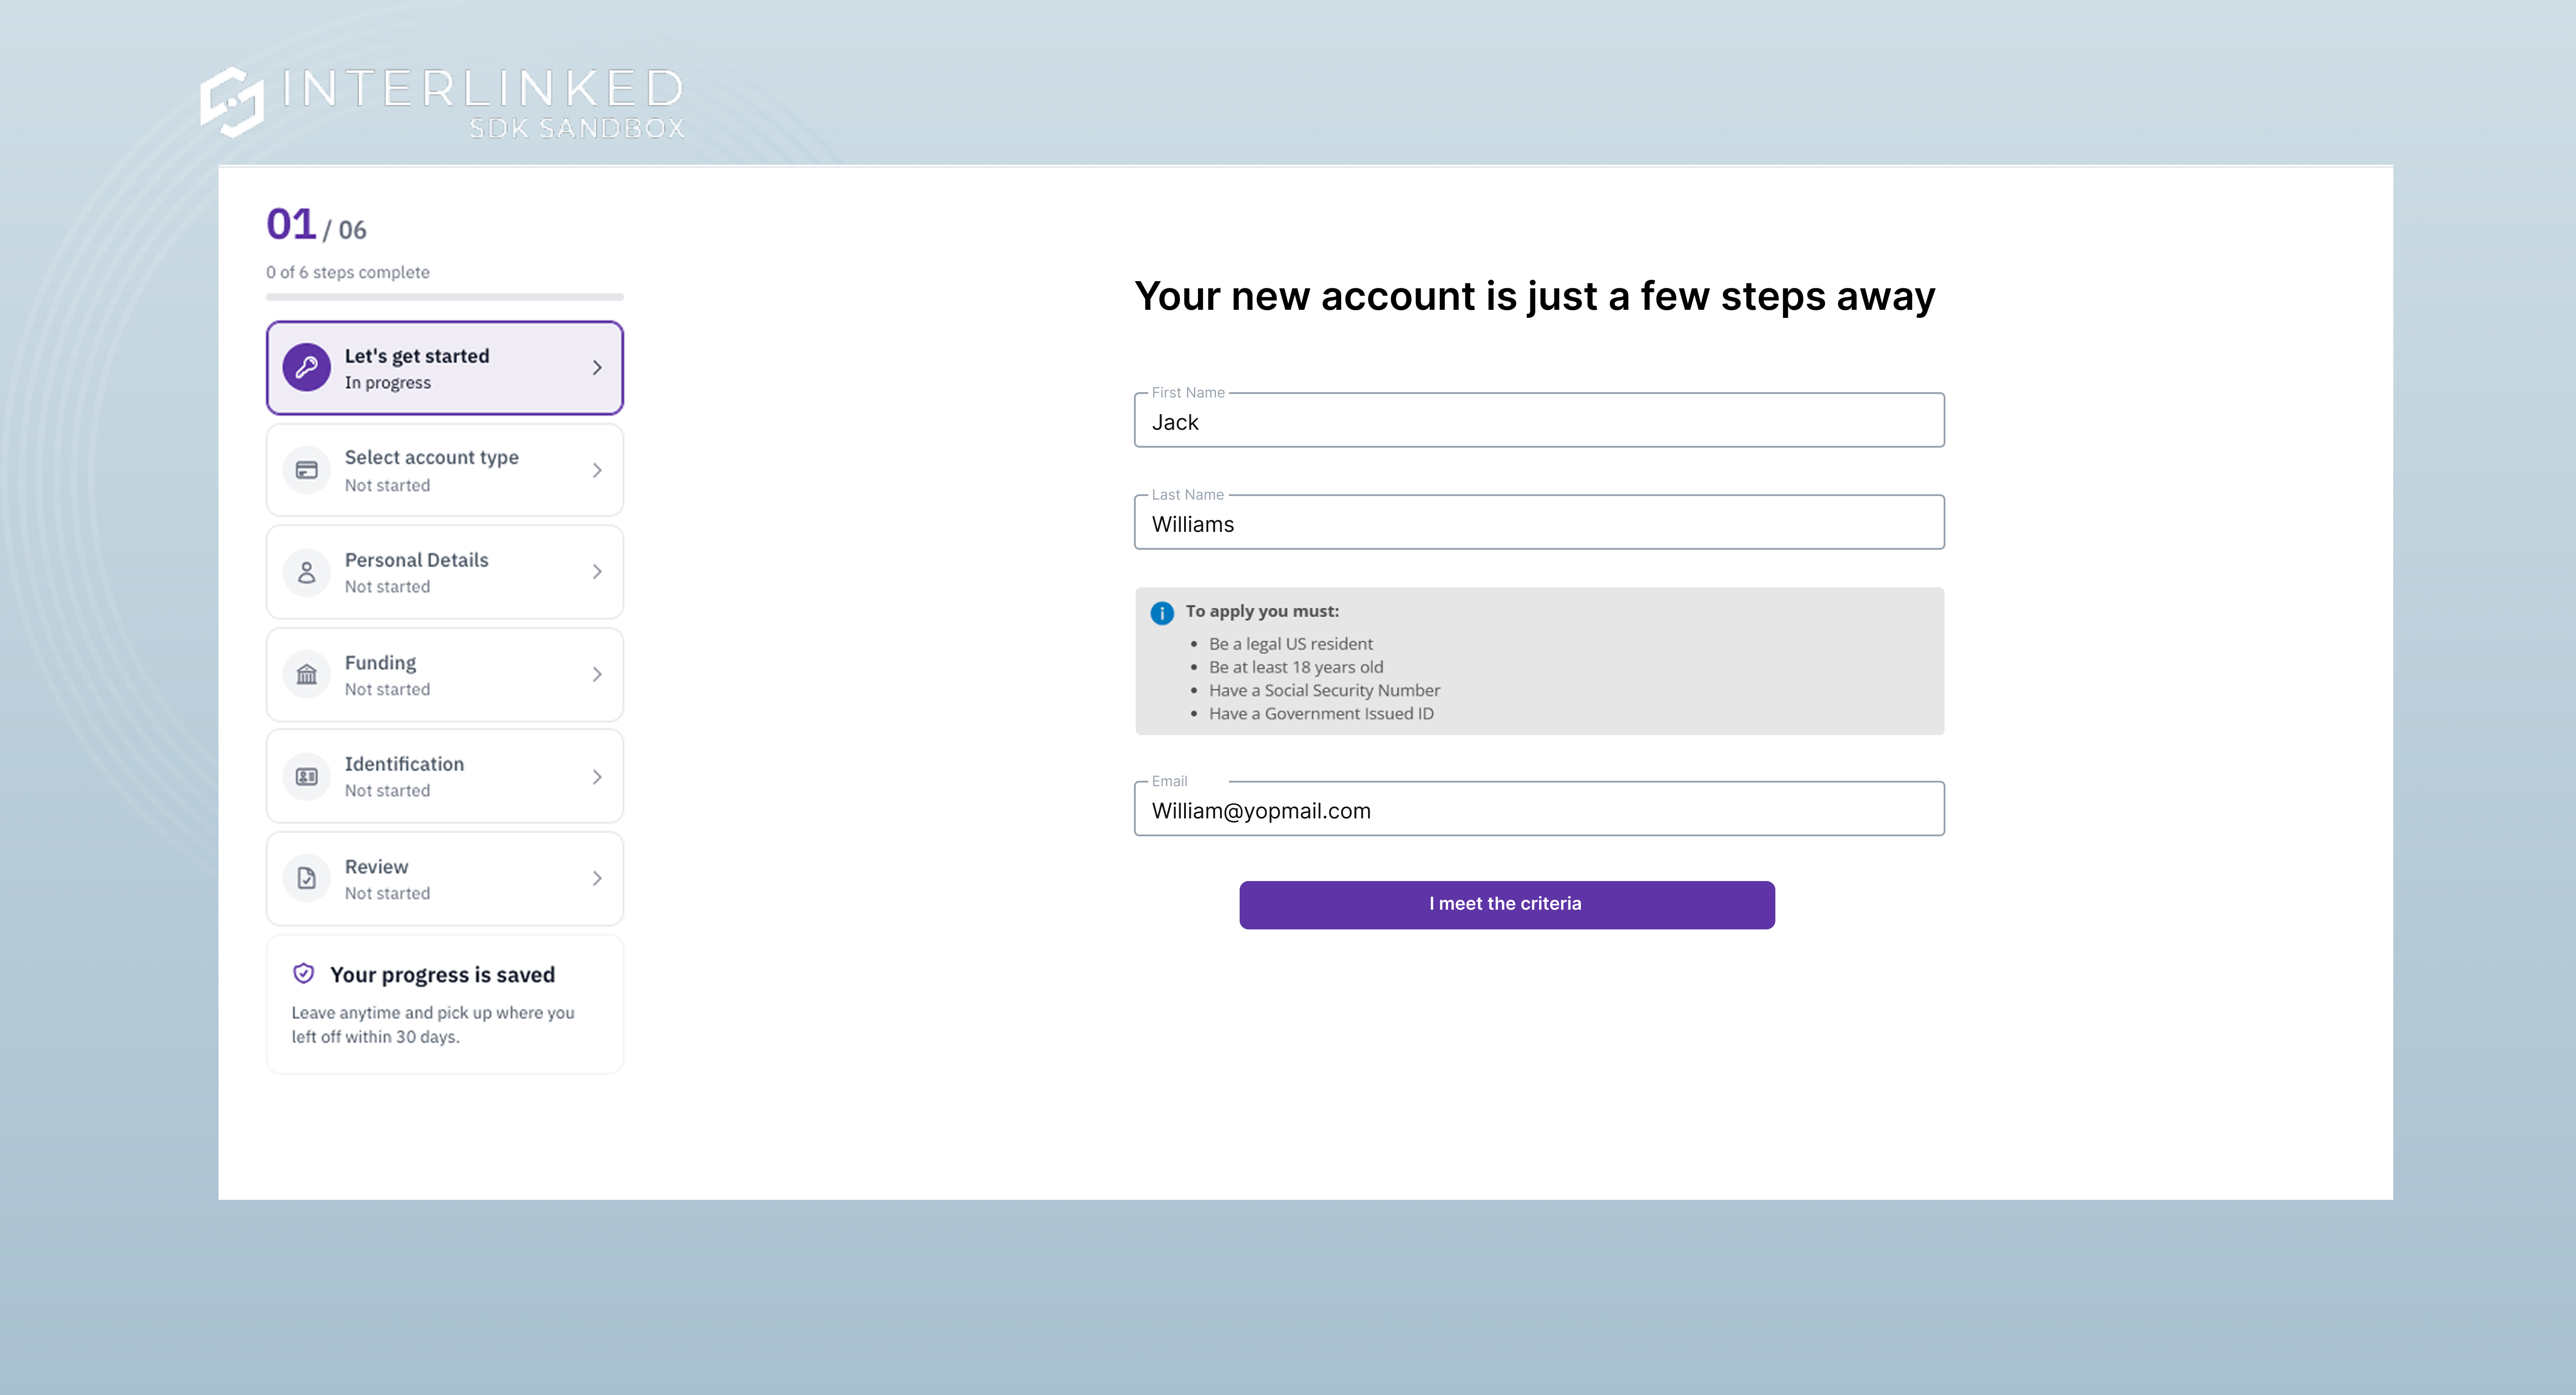 The applicant enters their first name, last name, and email address. Before continuing, they confirm they meet the basic requirements to apply:
- Be a legal US resident
- Be at least 18 years old
- Have a Social Security Number
- Have a government-issued ID
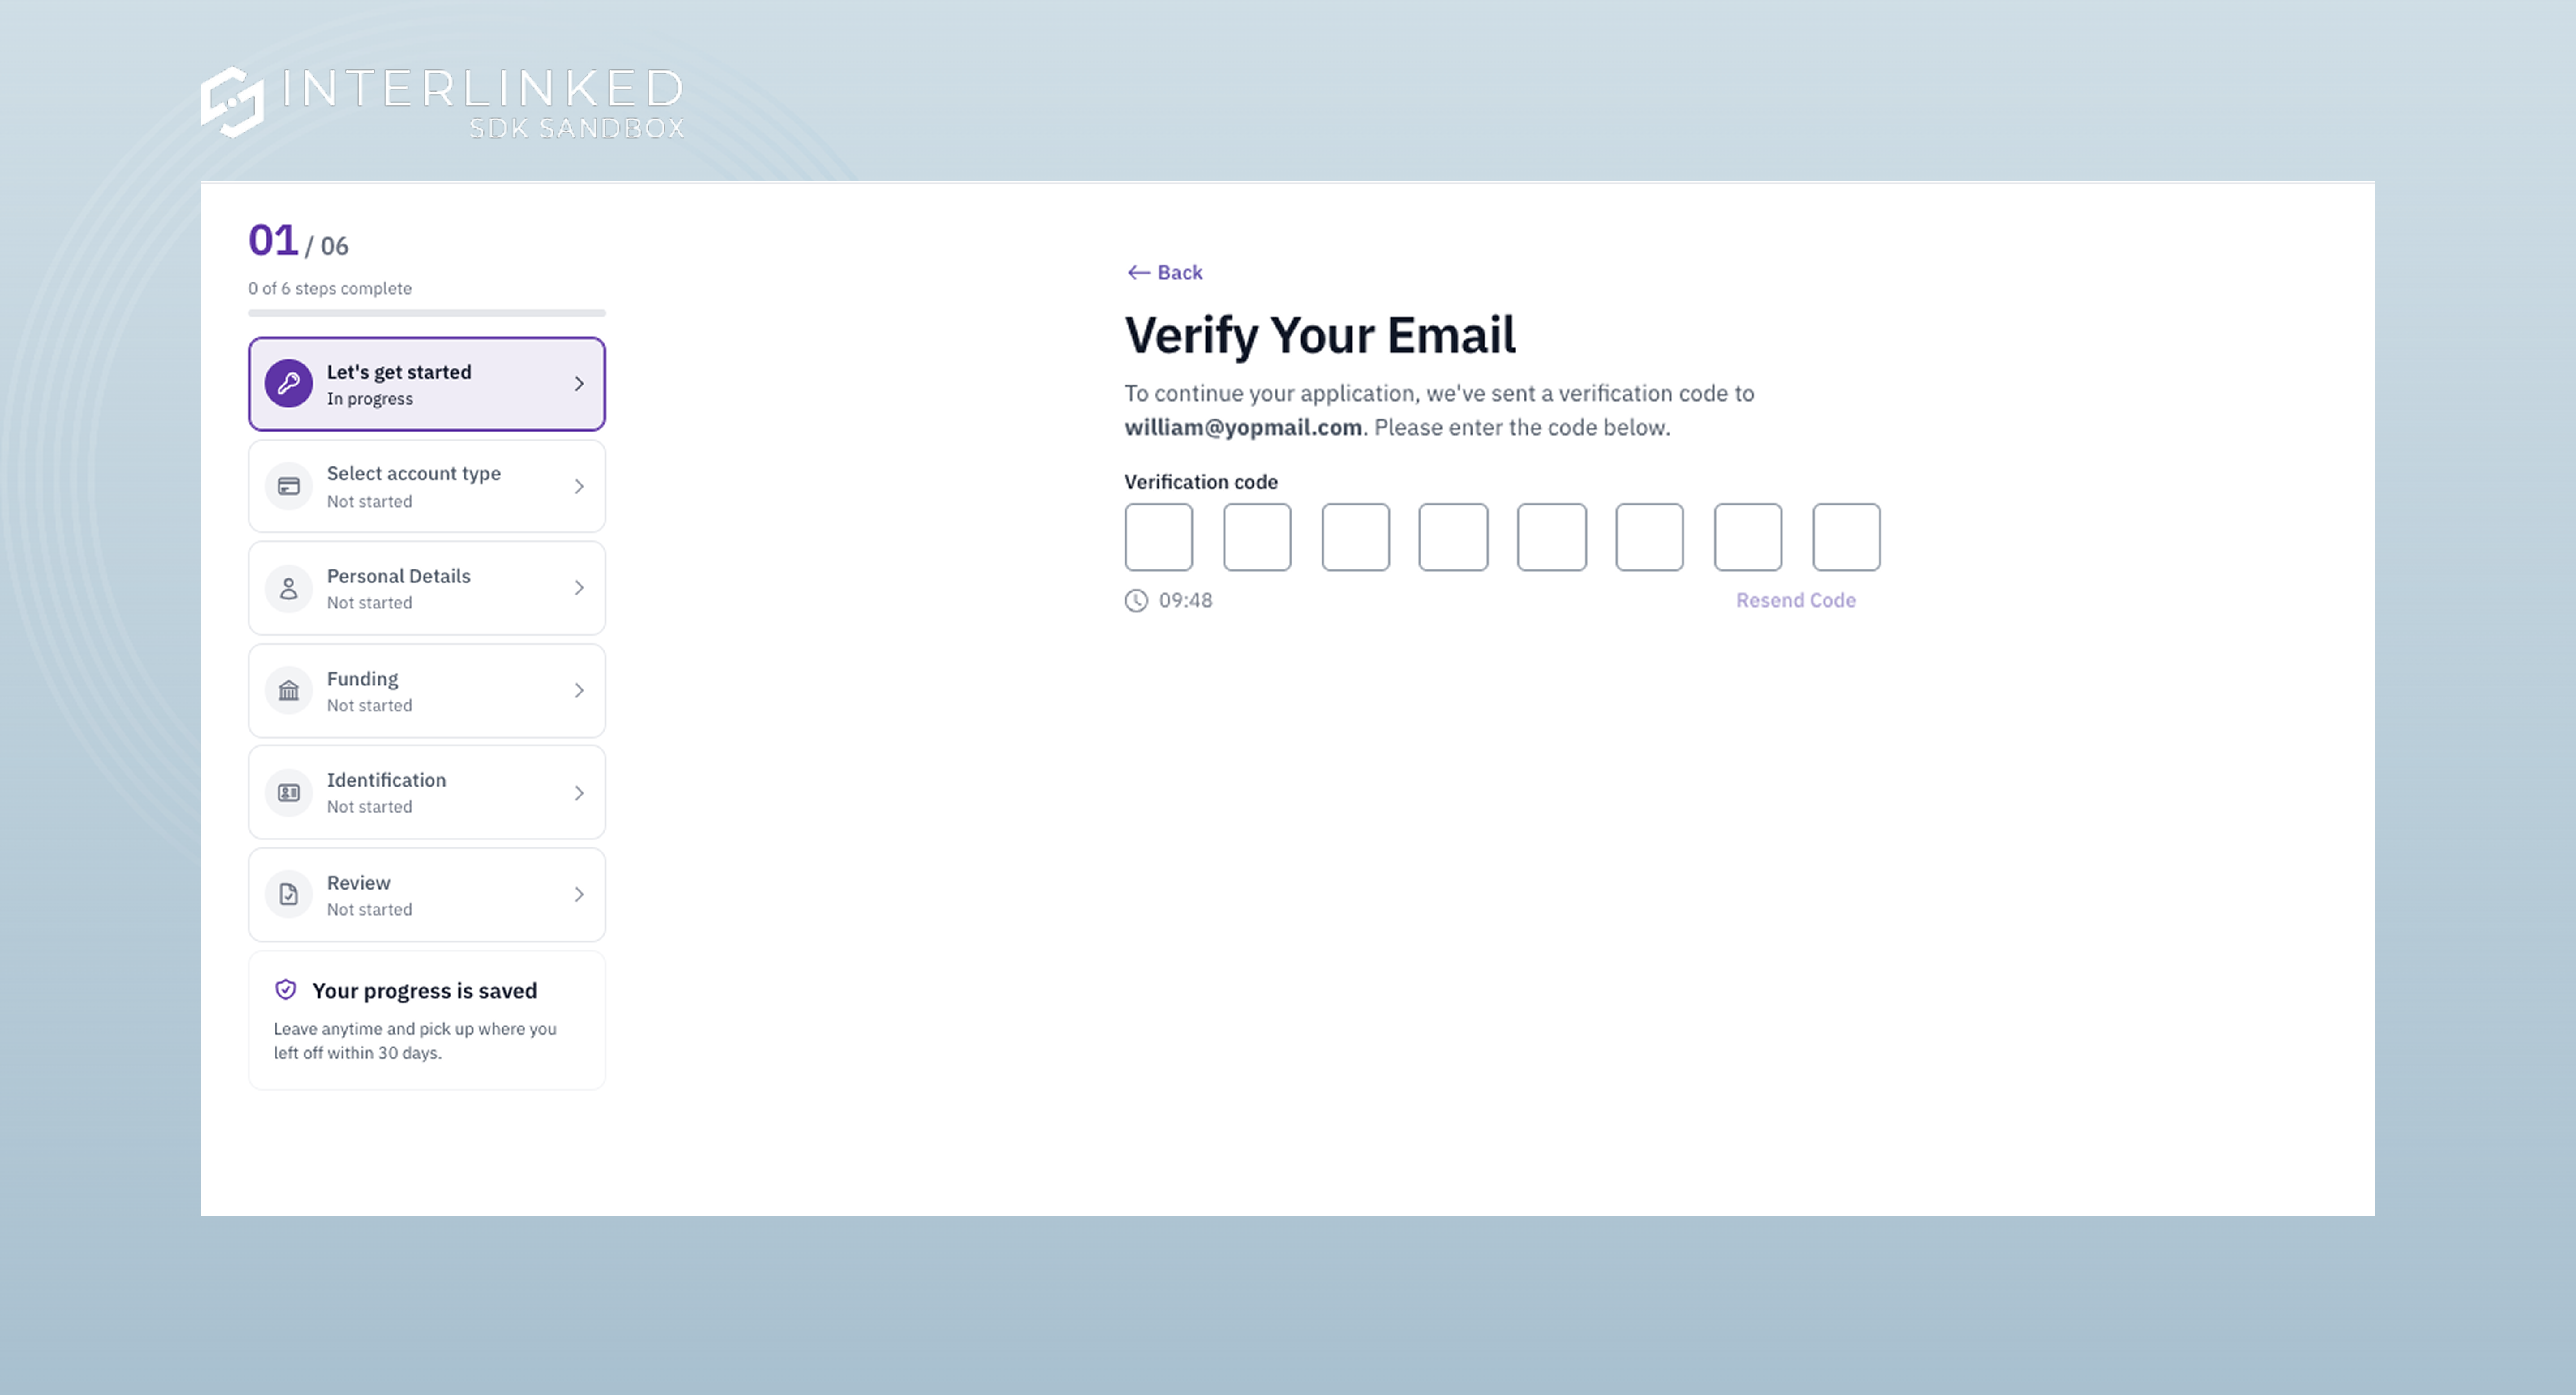 The applicant enters the 8-digit code sent to their email. Verifying the email proves the applicant owns the address, and it becomes the applicant’s identity for the rest of the application. If they sign in again later with the same address, the platform recognizes them and returns them to their application.
Online Banking Access
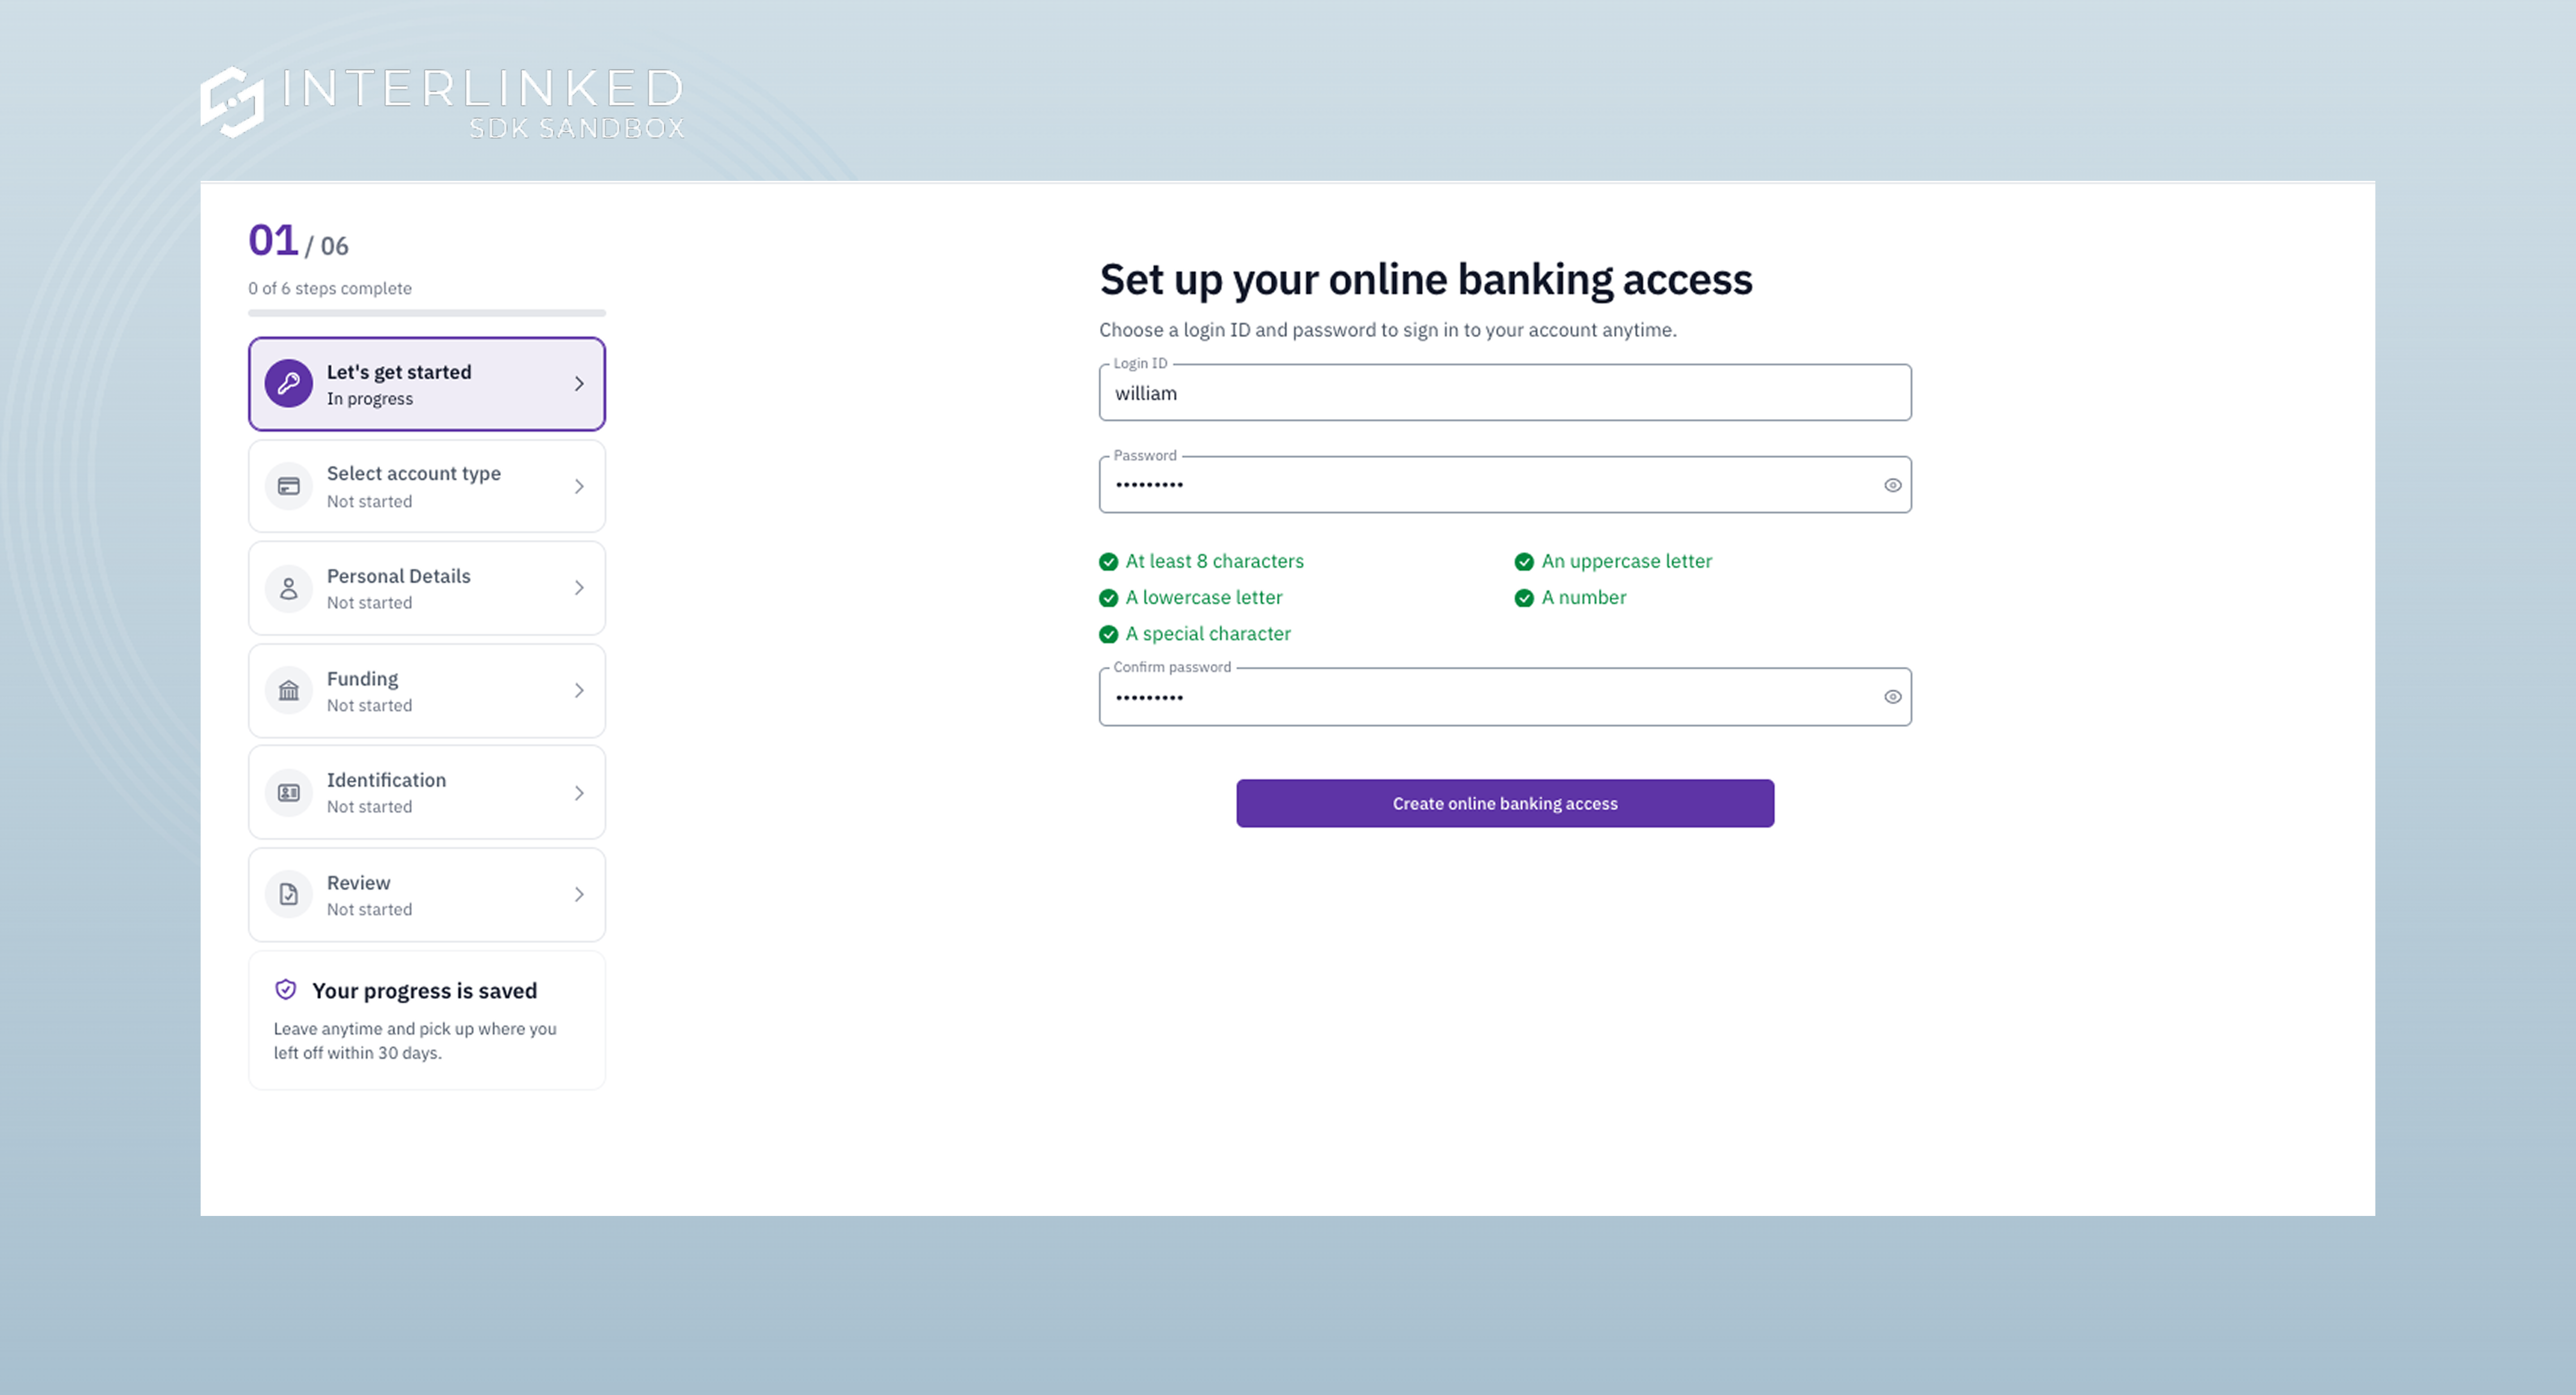 The applicant creates the login ID and password they will use to sign in to online banking once the account is open. The credentials are used only for the final sign-in handoff and are cleared from the application when the applicant leaves the confirmation screen.
2. Select Account Type
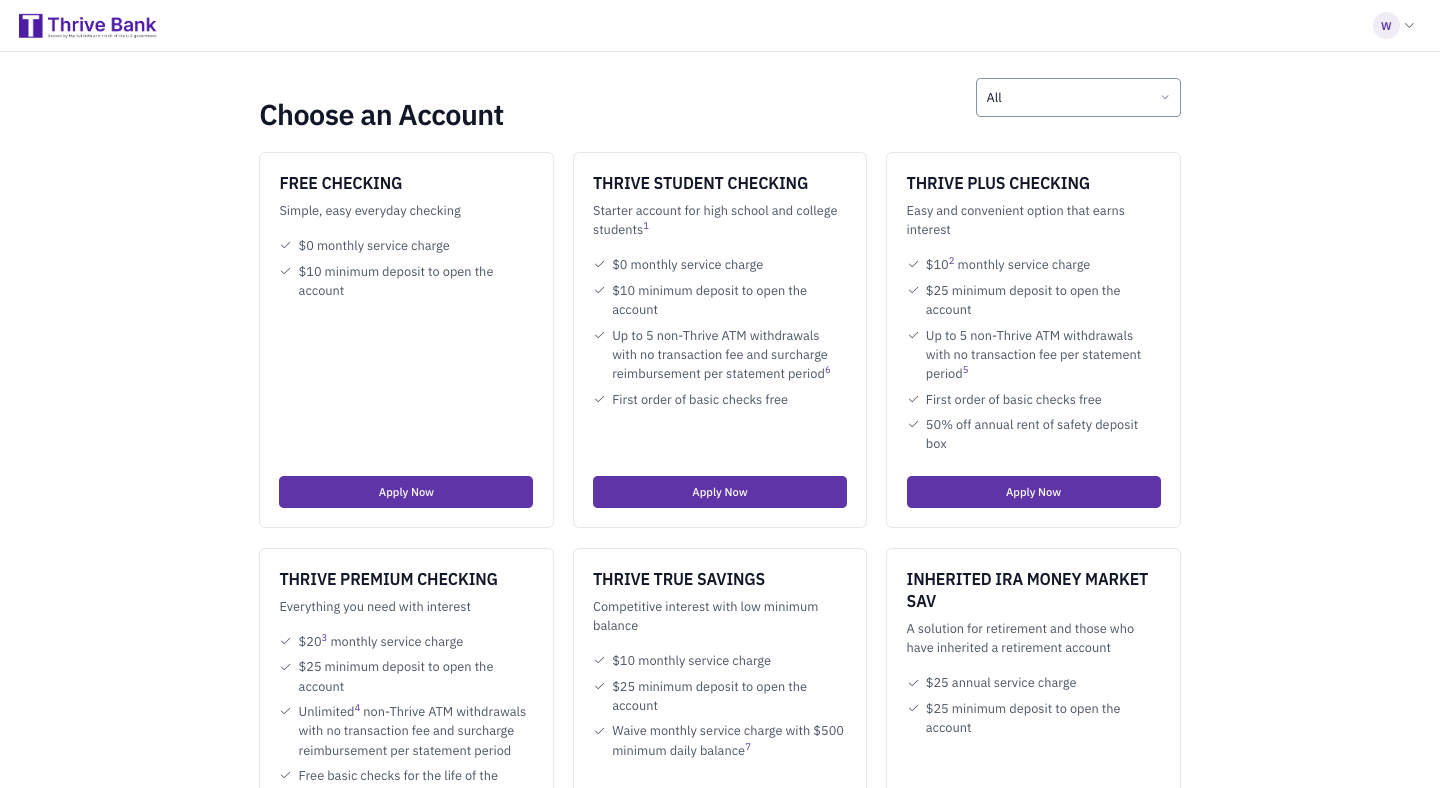 The applicant sees the institution’s consumer and business accounts as cards. Each card shows the account name, a short description, and its key terms, such as the monthly service charge, the minimum deposit to open the account, and included features like ATM fee reimbursement or free checks. Numbered footnotes below the cards explain the conditions that apply to each term.
The applicant can filter the list by Checking, Savings, or Business, then selects Apply Now on the account they want. The account they choose determines the rest of the application. Choosing a savings account skips the debit card step, and choosing a business account starts the business application instead of the consumer steps on this page.
The accounts, terms, and rates come from the institution’s core banking system, and all account openings are subject to approval.
3. Personal Information
This step collects the contact and employment details the institution needs to open the account.Contact and Address
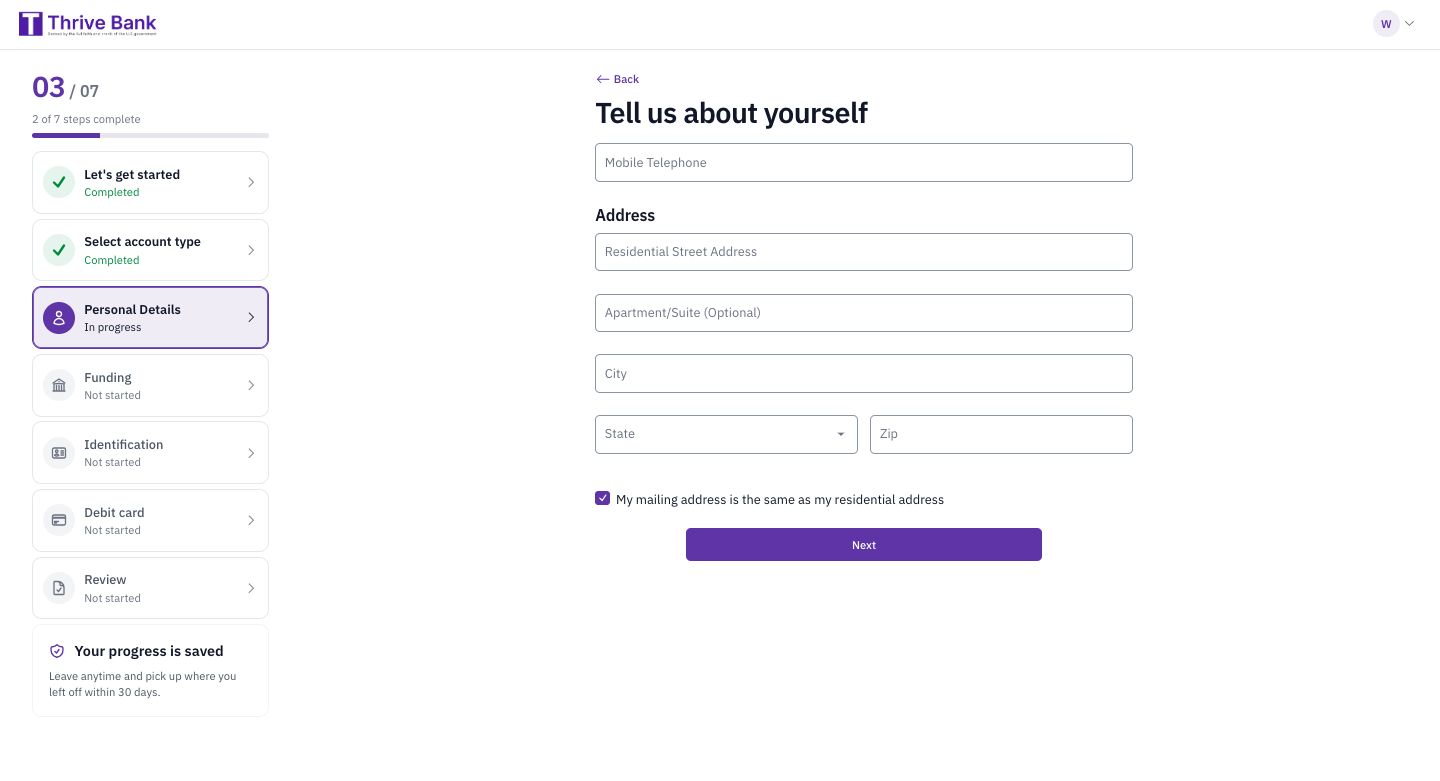 The applicant provides a mobile telephone number and their residential address, including apartment or suite, city, state, and zip. The name and email entered at the start are reused, so they are not asked again.
The applicant’s mailing address is assumed to be the same as their residential address. If it differs, they clear the checkbox and enter a separate mailing address.
Employment
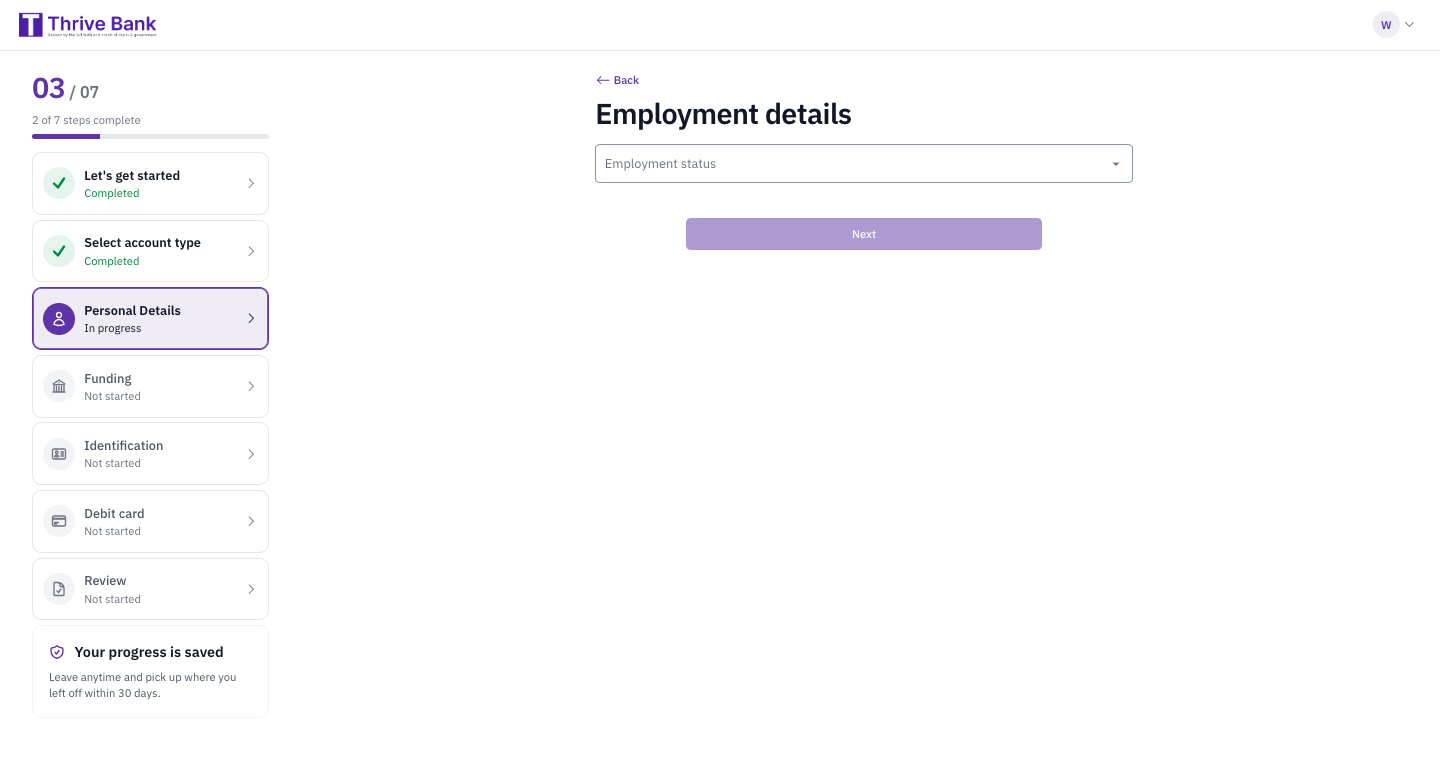 The applicant selects their employment status. For statuses that call for it, they are also asked for their employer name and occupation. Employment details help the institution meet its regulatory and risk requirements, and they can be changed later on the review screen.
4. Funding
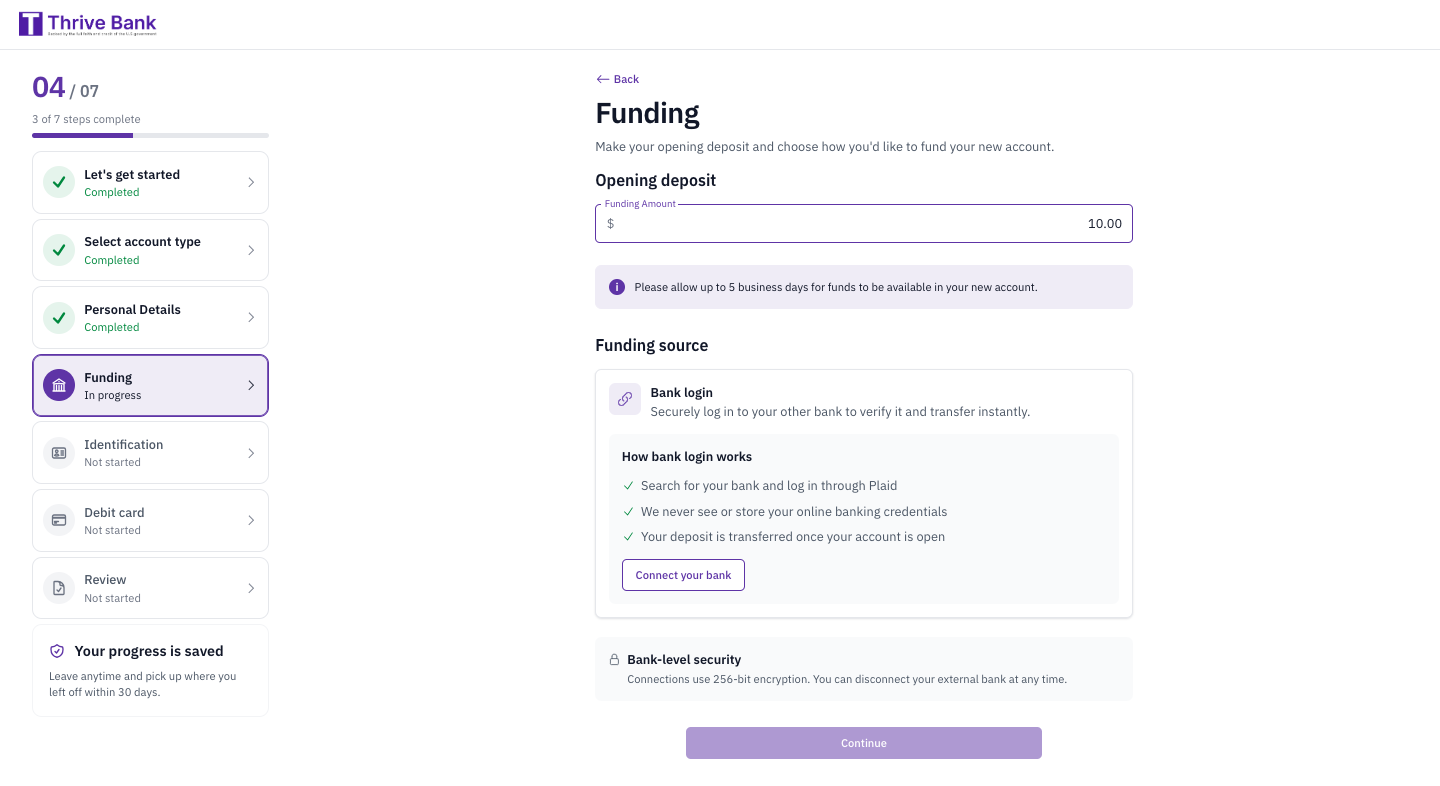 On Funding, the applicant chooses how much to deposit and where the money will come from. The opening deposit starts at the minimum required for the selected account, and the applicant can enter a higher amount.
The funding source is an account at another financial institution, connected securely through Plaid. The screen explains how the connection works: the applicant searches for their bank and logs in through Plaid, the platform never sees or stores their online banking credentials, and the deposit is transferred once the new account is open. Funds can take up to 5 business days to be available in the new account.
The applicant cannot continue until a bank account is linked.
Connect Your Bank
Selecting Connect your bank opens the Plaid window on top of the application. Plaid first asks for a mobile phone number, and the applicant can use either path.With a Phone Number
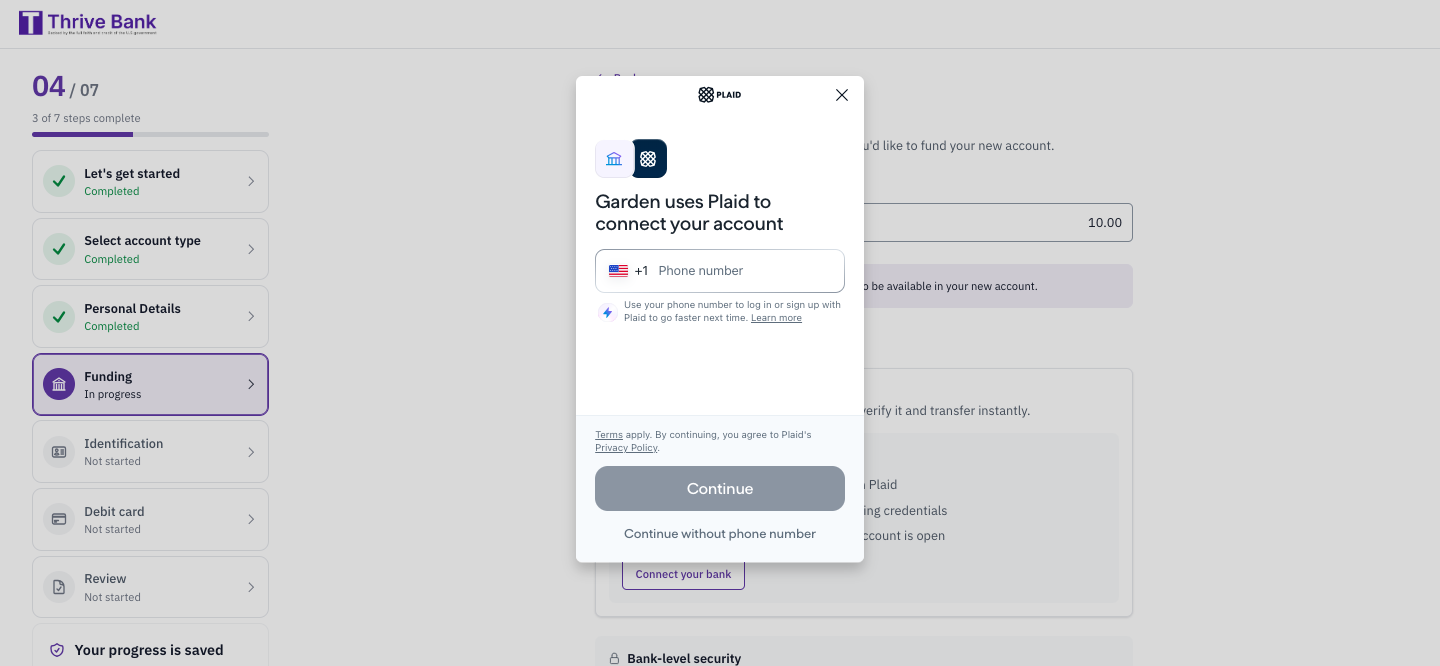 Plaid uses the phone number to recognize returning users. If the applicant has connected accounts through Plaid before, they confirm their phone number with a code and see their saved accounts, so they can skip logging in to their bank. If the number is new, Plaid signs them up so the next connection is faster.
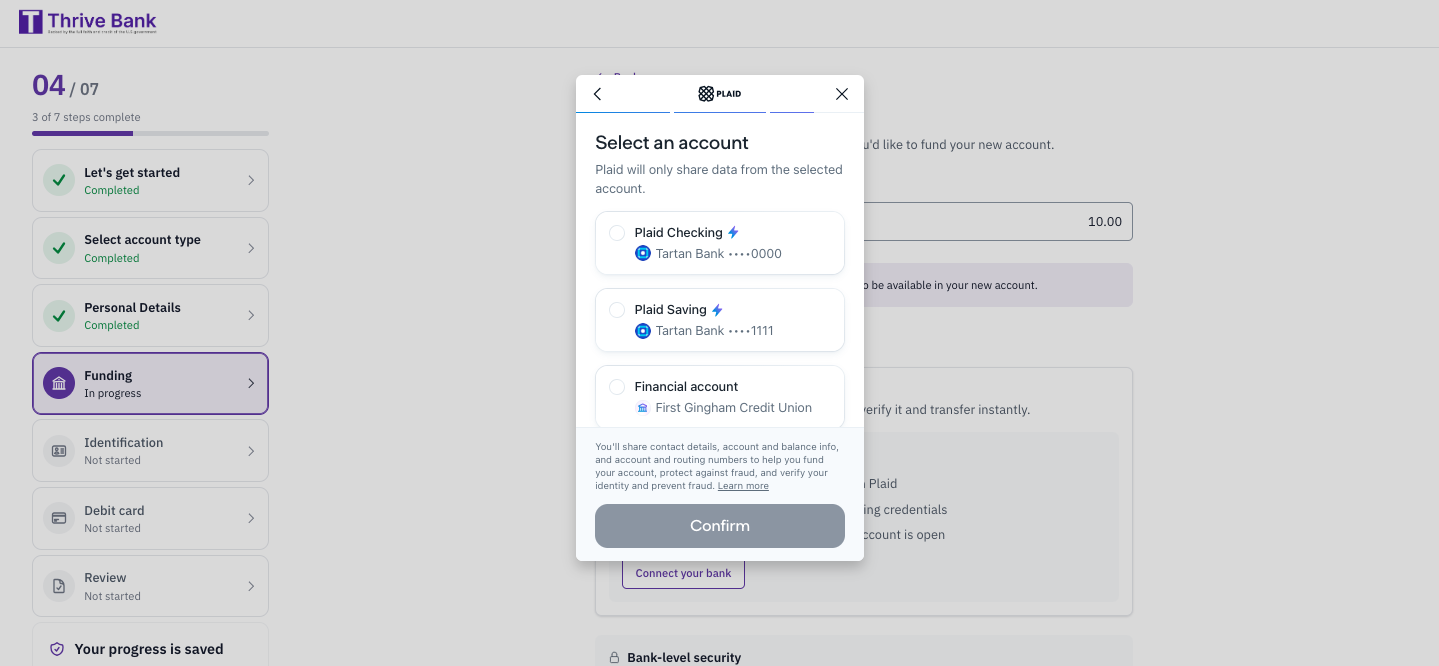 The applicant selects the saved account to fund from and confirms. Plaid shares data only from the selected account.
Without a Phone Number
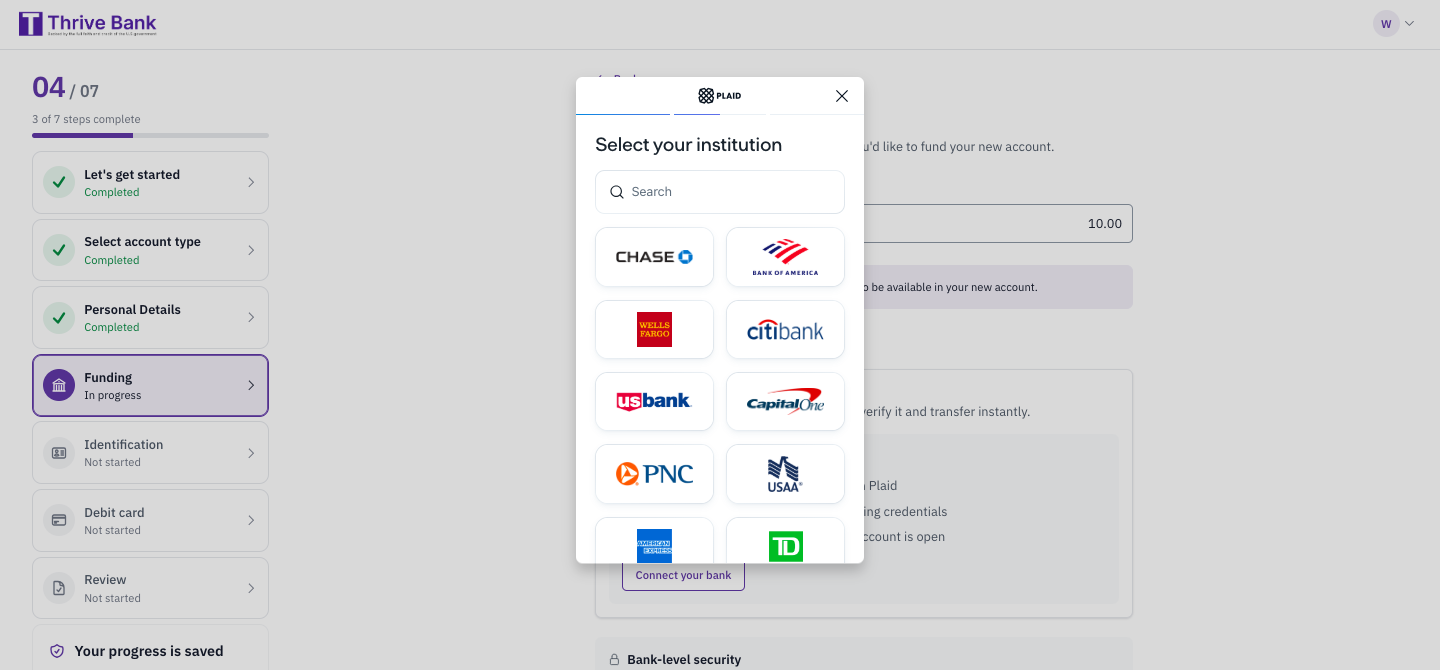 The applicant selects Continue without phone number, then searches for their bank or picks it from the list of popular institutions.
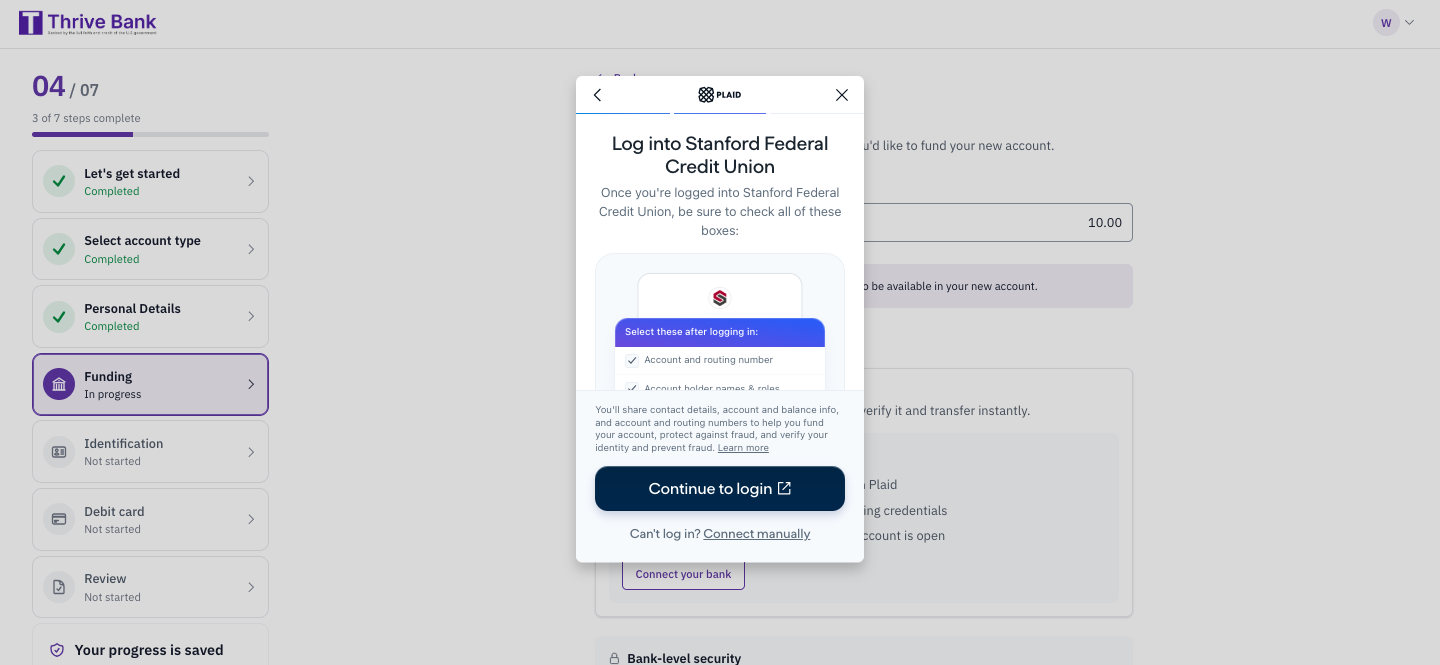 Plaid explains which options the applicant must select after logging in so that the account details needed for funding are shared. The applicant continues to their bank’s own login page. If they cannot log in, they can choose Connect manually instead.
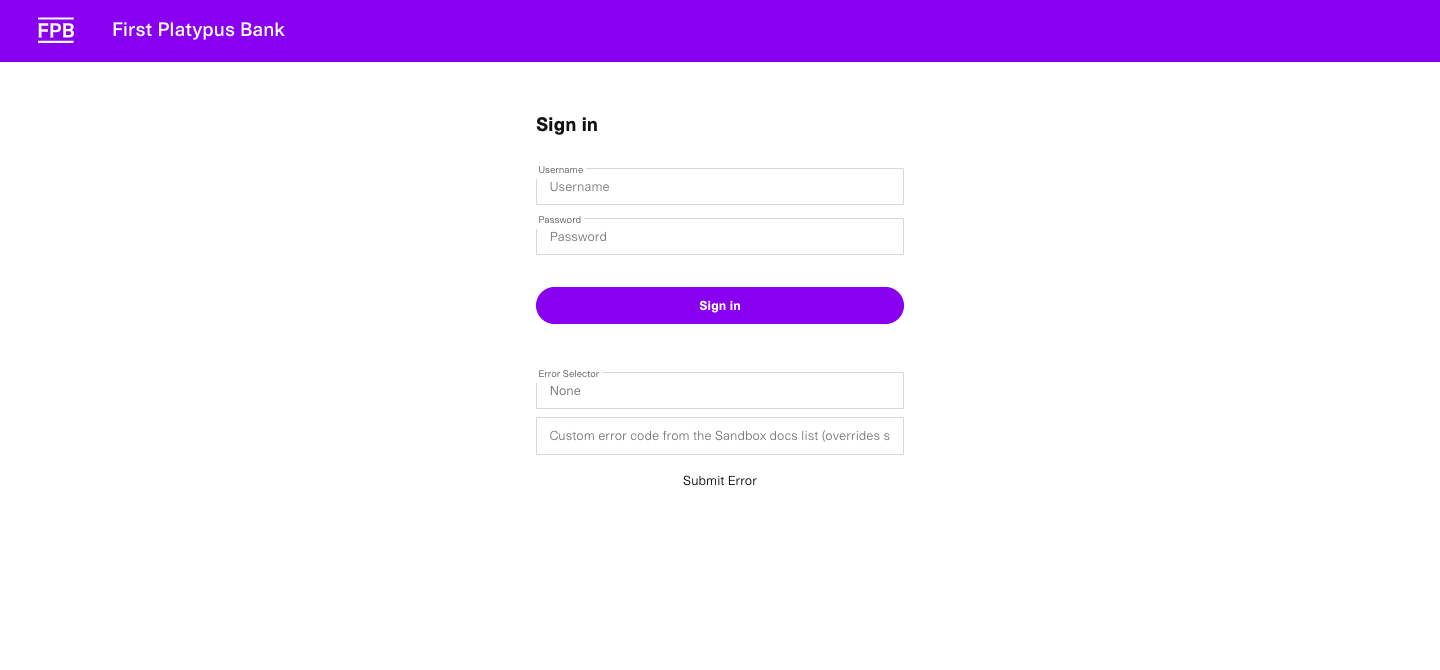 The applicant signs in with their online banking credentials and completes any extra security checks their bank requires, such as a one-time code. These steps are handled by the bank and vary from one bank to another. The examples on this page use a test institution.
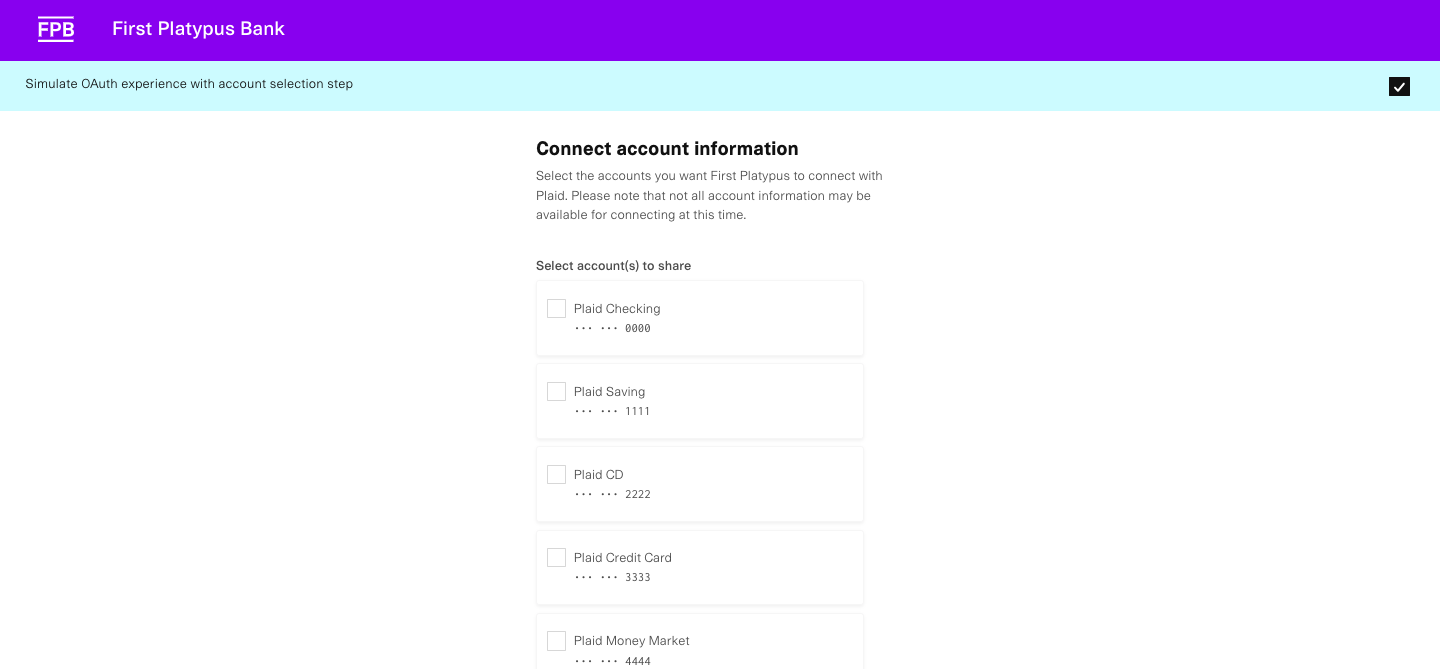 The bank asks which of the applicant’s accounts to share with Plaid.
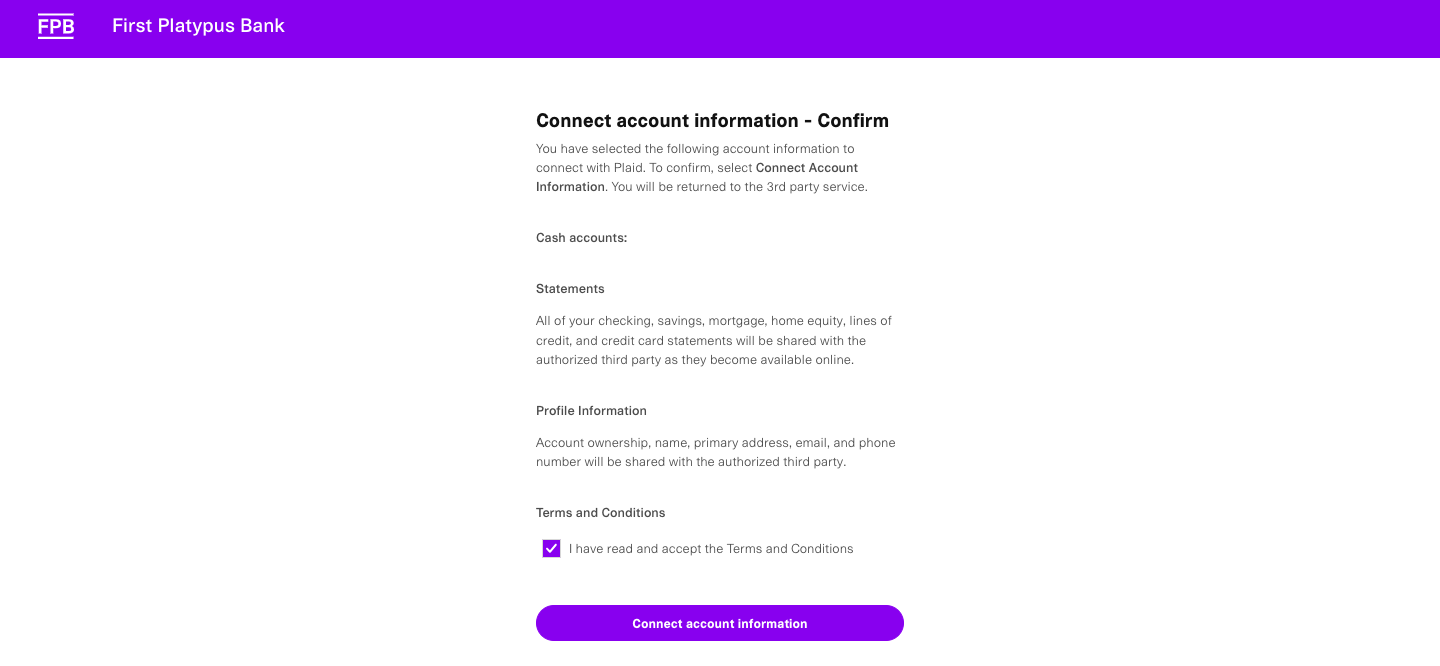 The bank summarizes the information that will be shared. The applicant accepts the terms and returns to the application.
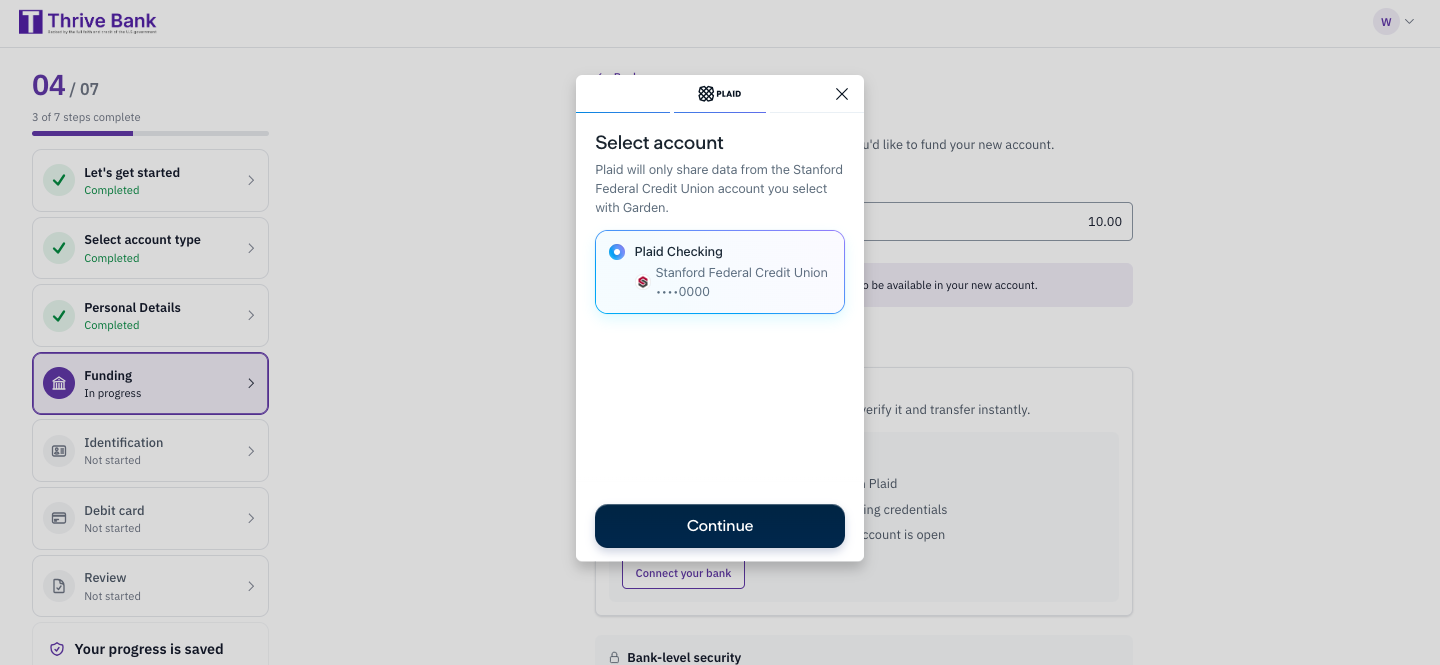 Back in Plaid, the applicant selects the account to fund from.
Account Linked
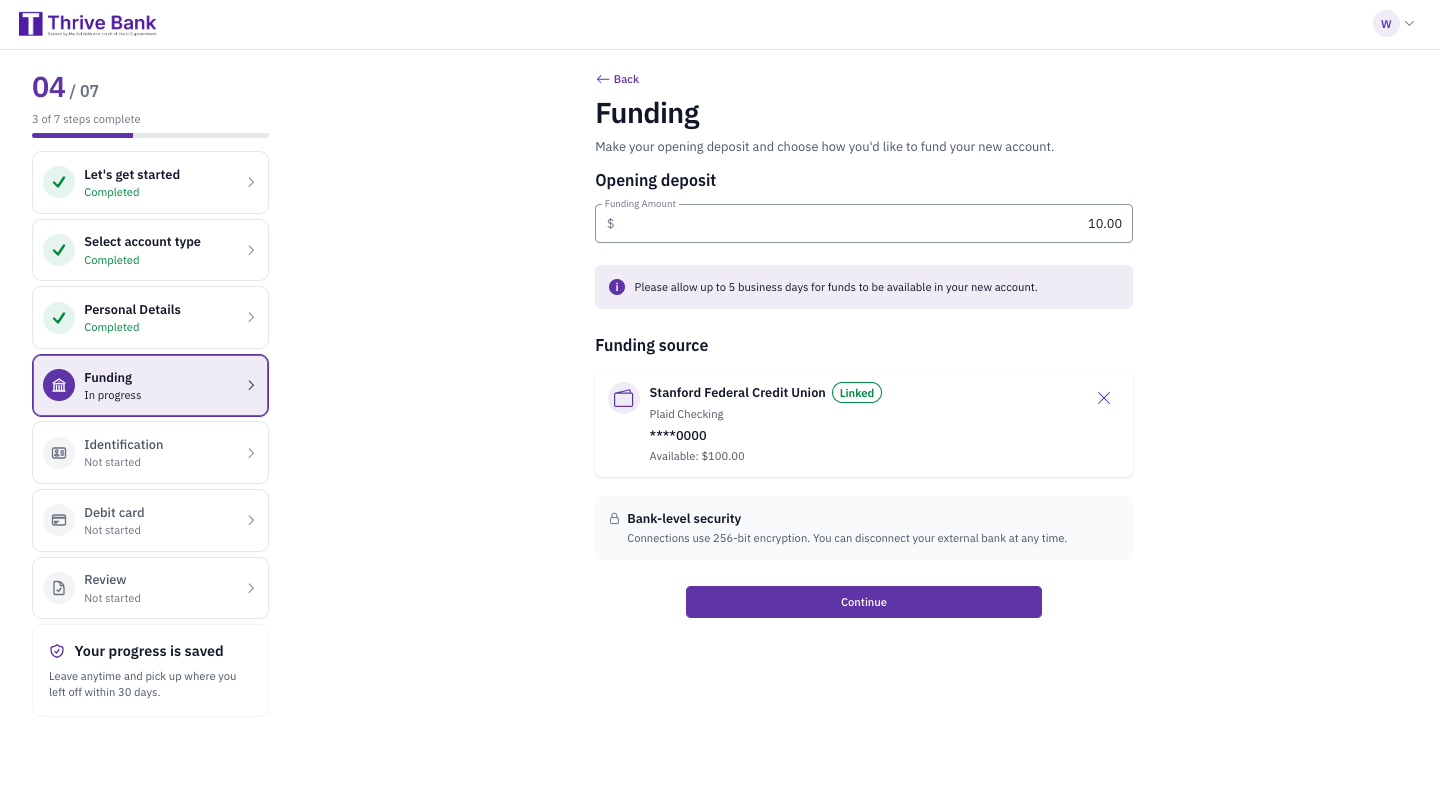 On both paths, the applicant returns to Funding with the account shown under Funding source. The card shows the bank name with a Linked tag, the account name, a masked account number, and the available balance. The applicant can remove the account to connect a different one, or change the opening deposit, before selecting Continue.
If the connection does not complete, the applicant sees a message and can try again:
5. Identification
This step verifies the applicant’s identity. Verification protects the institution and the applicant from fraud, and it is required before the account can be opened.Verify Your Identity
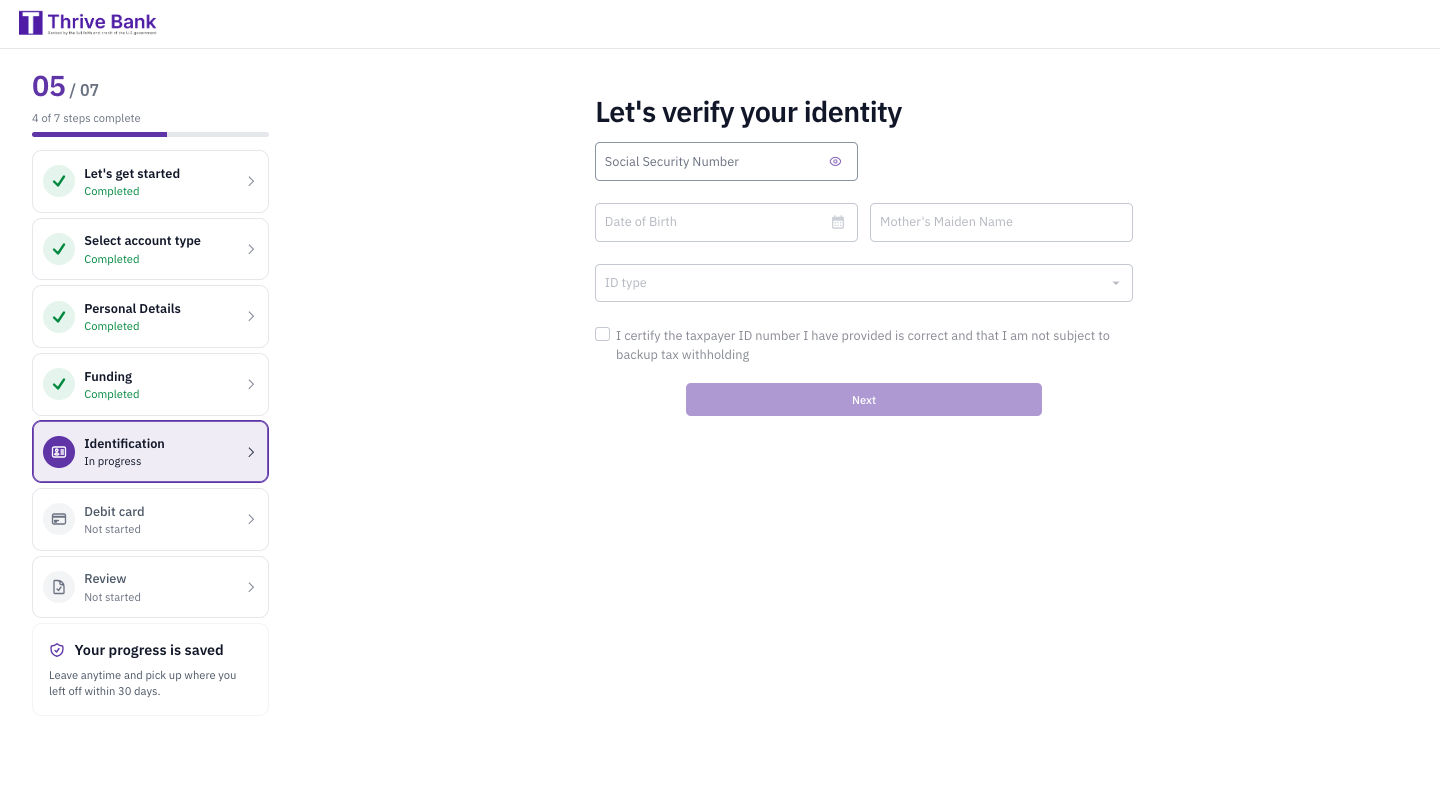 The applicant enters their Social Security Number, date of birth, and mother’s maiden name. The Social Security Number is checked as it is entered, then shown masked. The applicant also chooses the type of ID they will provide: a driver’s license, a state ID, or a passport.
The applicant certifies that the taxpayer ID number they provided is correct and that they are not subject to backup tax withholding. They cannot continue until all required information is entered and the certification is accepted.
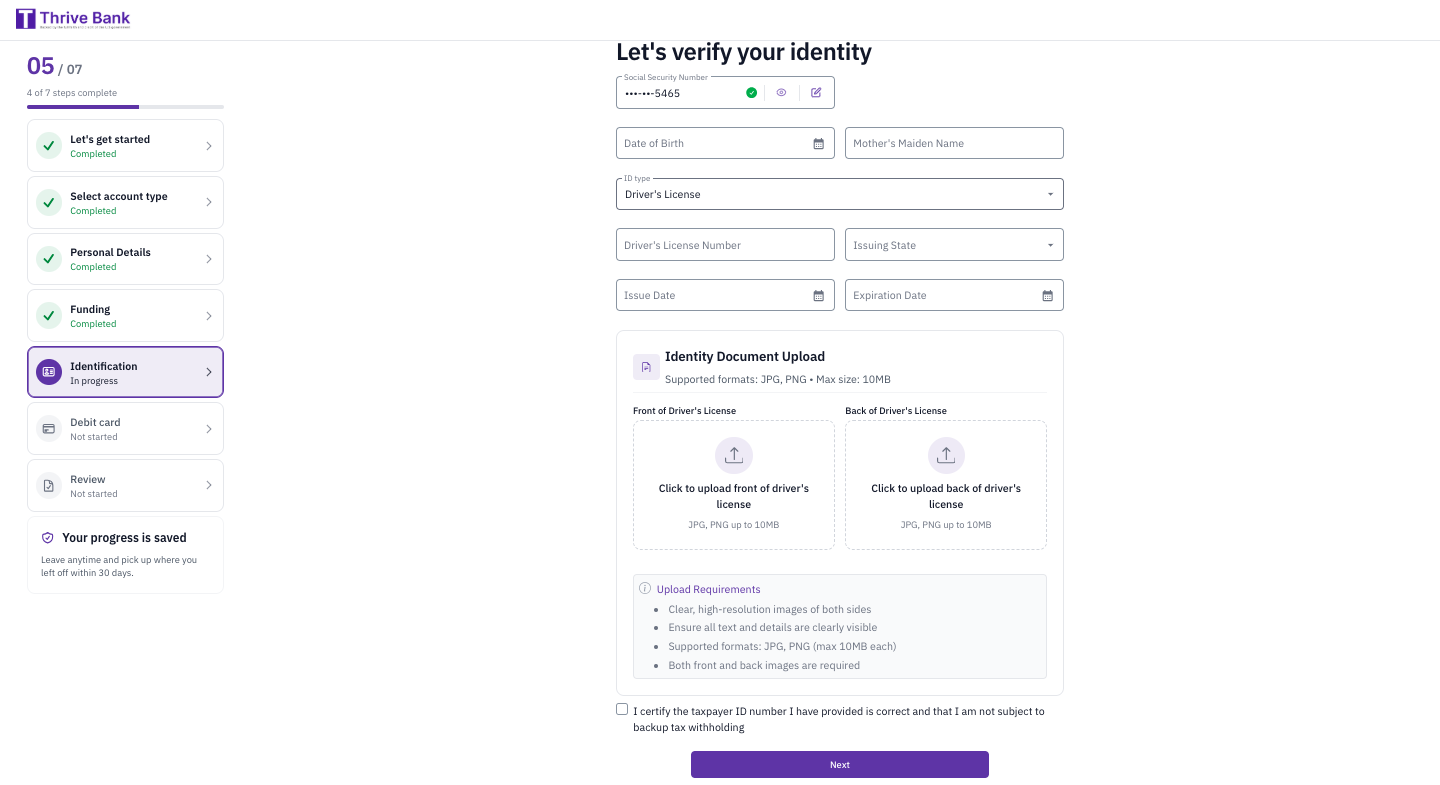 Choosing an ID type reveals the details for that document. For a driver’s license, the applicant enters the license number, issuing state, issue date, and expiration date, then uploads an image of the front and back. Images must be JPG or PNG files up to 10MB each, clear and high resolution, with all text visible. Both sides are required.
The identity check result determines what happens next:
If the identity check matches an existing customer, no duplicate account is opened and the application ends.
Joint Owner
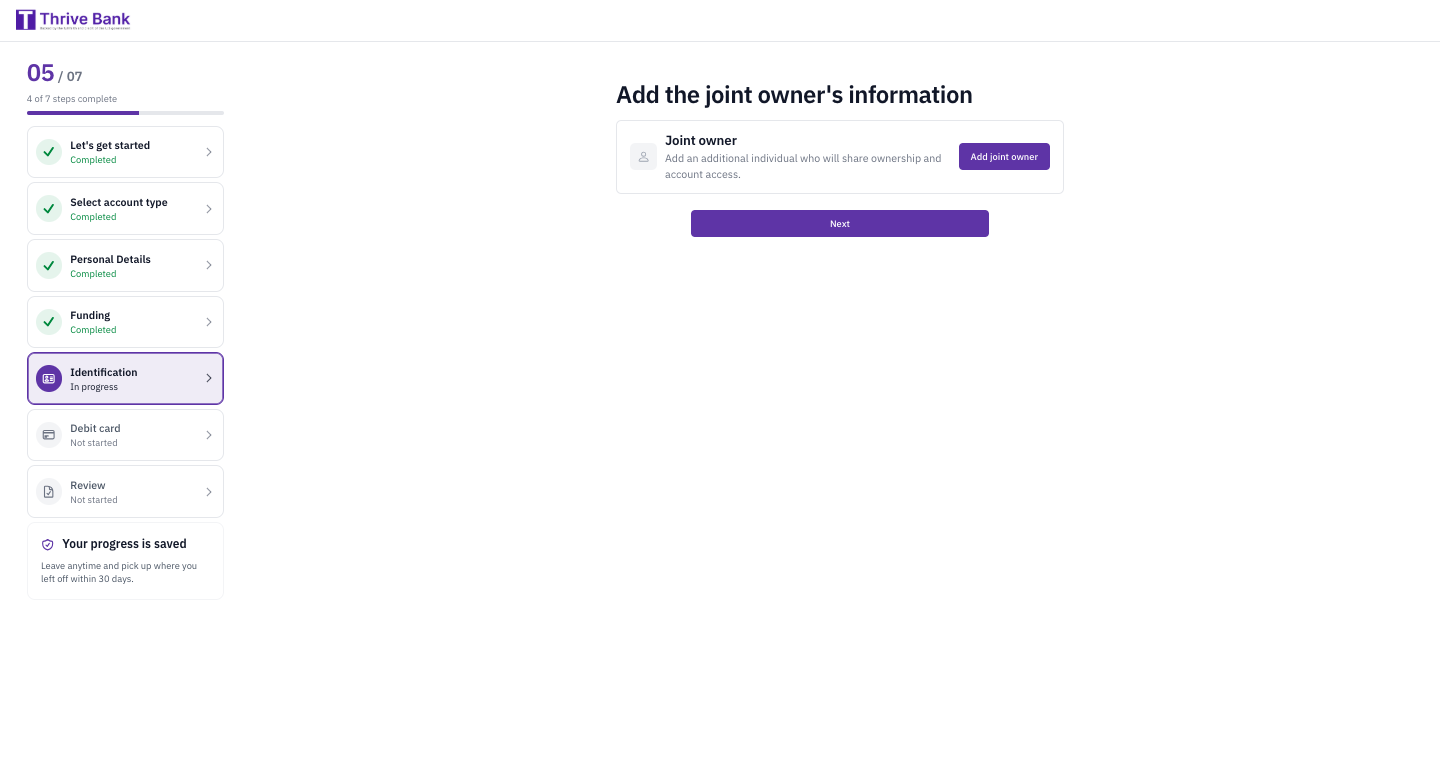 This screen lets the applicant add anyone who will share ownership of the account and have access to it. An applicant opening an account on their own selects Next without adding anyone.
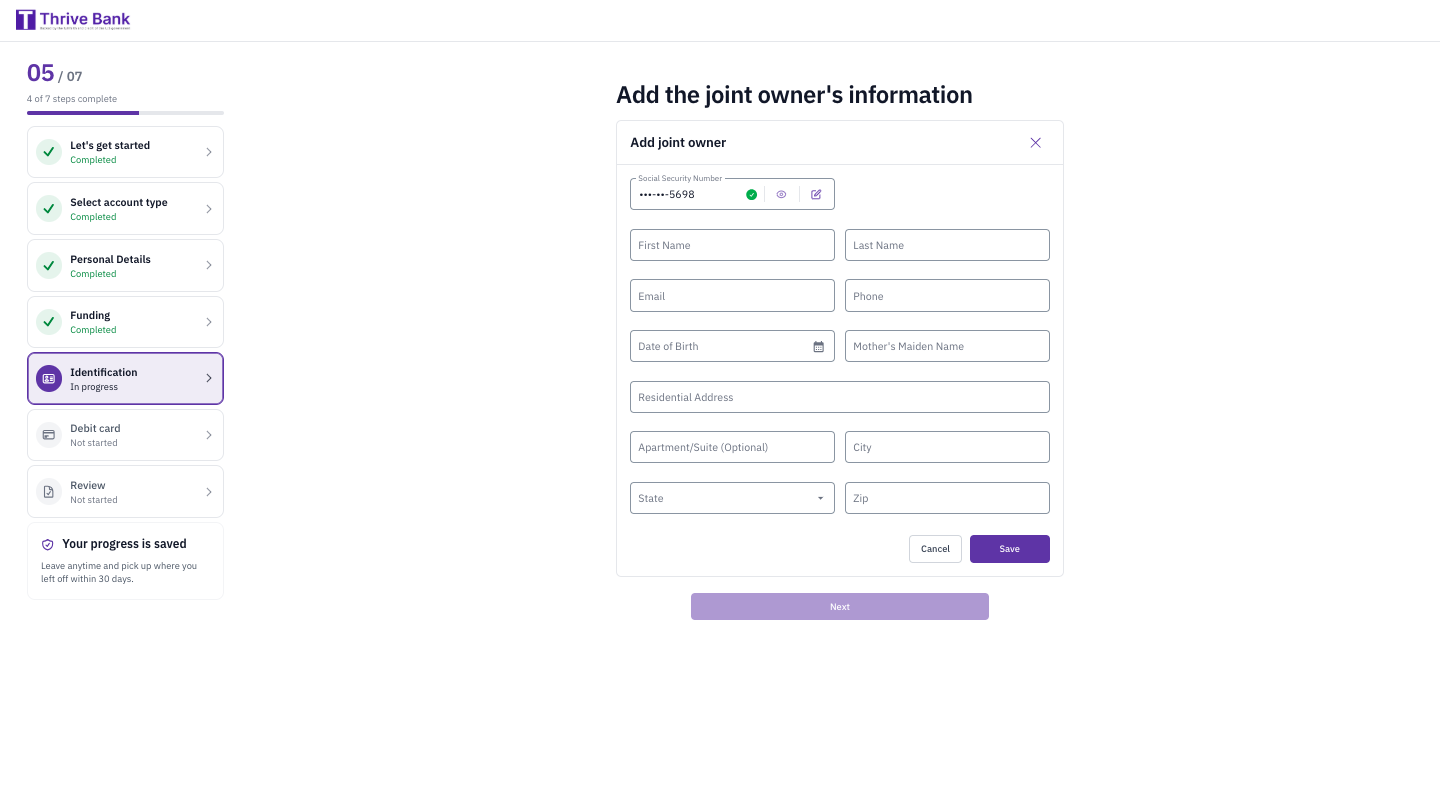 For each joint owner, the applicant enters the same kind of personal information collected for the primary applicant: Social Security Number, name, email, phone, date of birth, mother’s maiden name, and residential address.
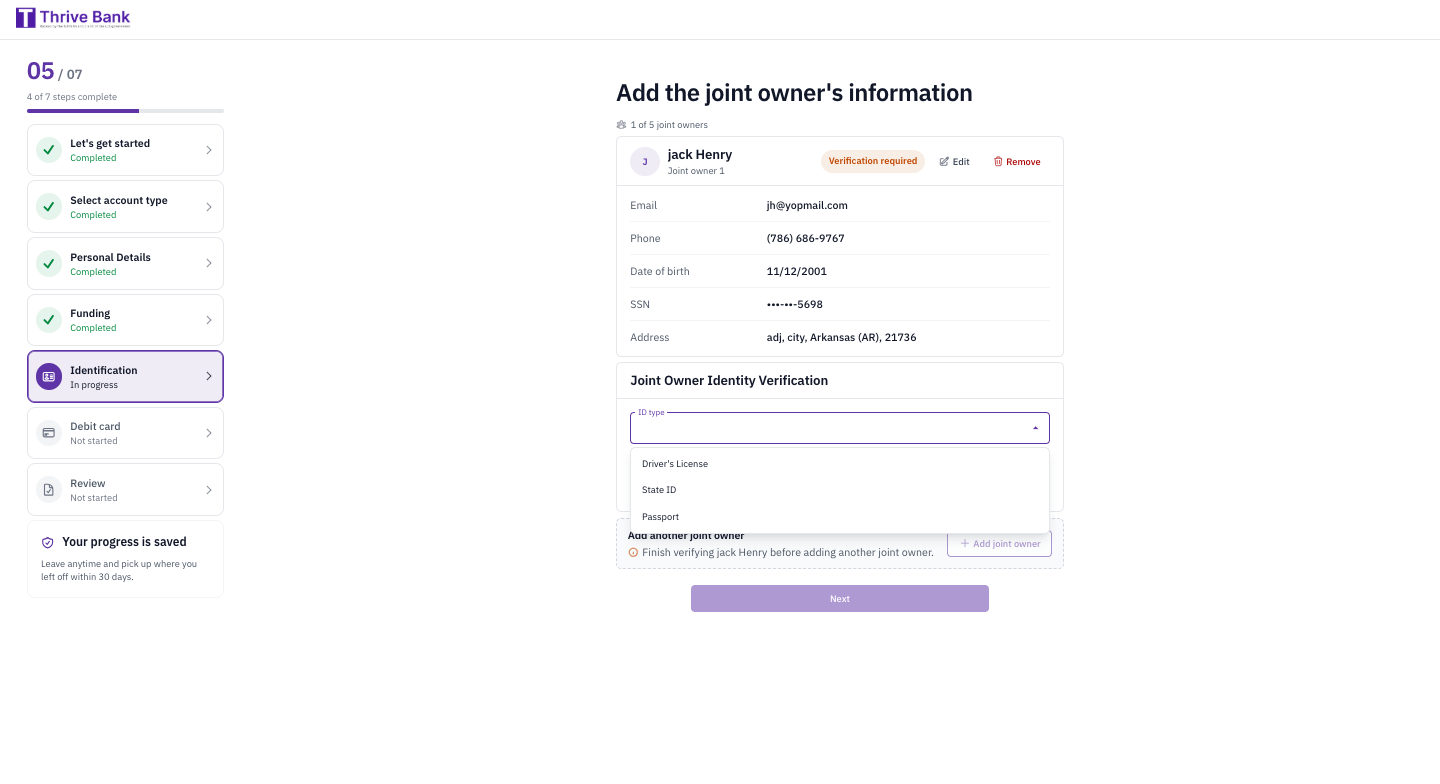 After saving, the joint owner appears as a card marked Verification required. Every joint owner is verified separately, using the same ID check as the primary applicant, and a joint owner must be verified before another can be added.
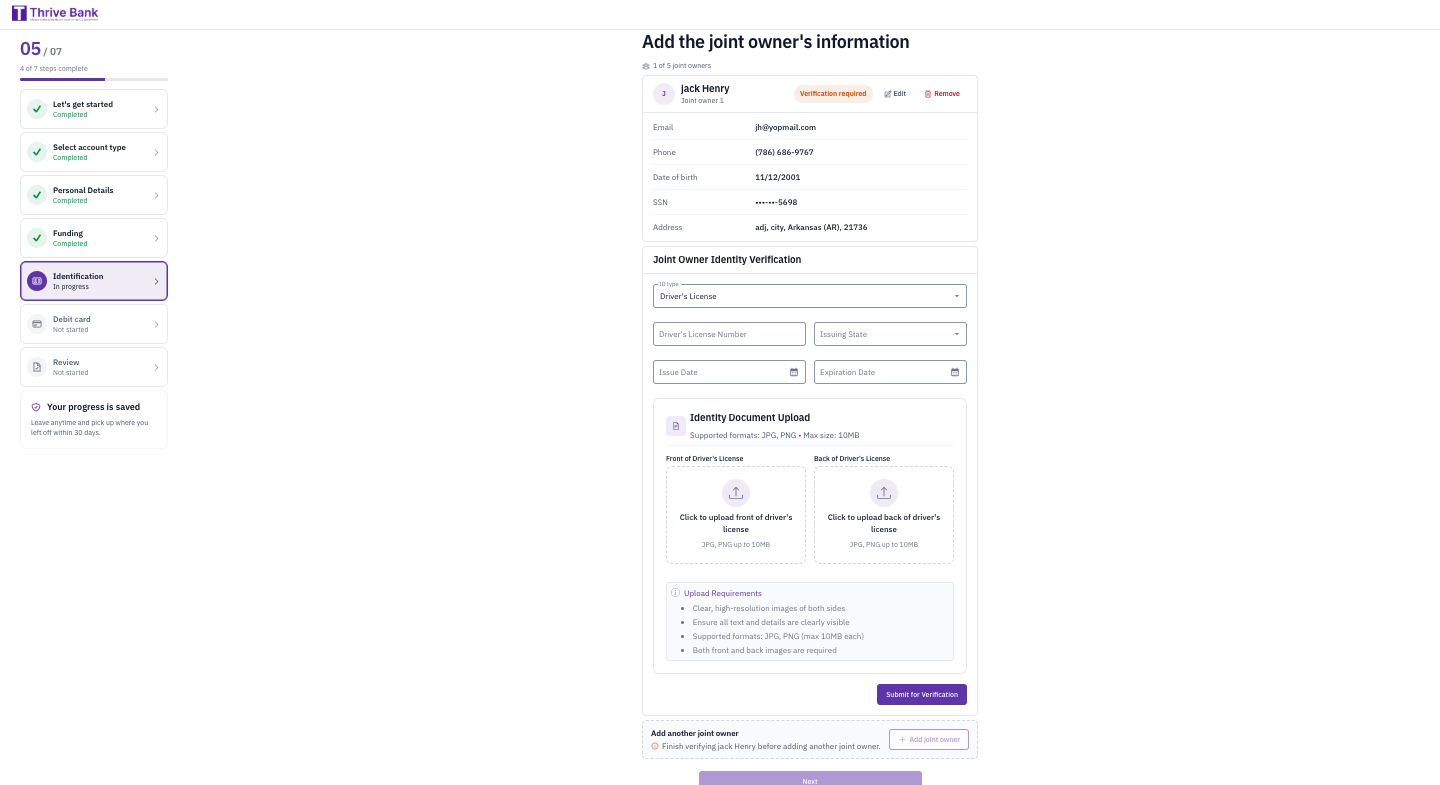 The applicant selects the joint owner’s ID type, enters the ID details, uploads the front and back of the ID, and selects Submit for Verification.
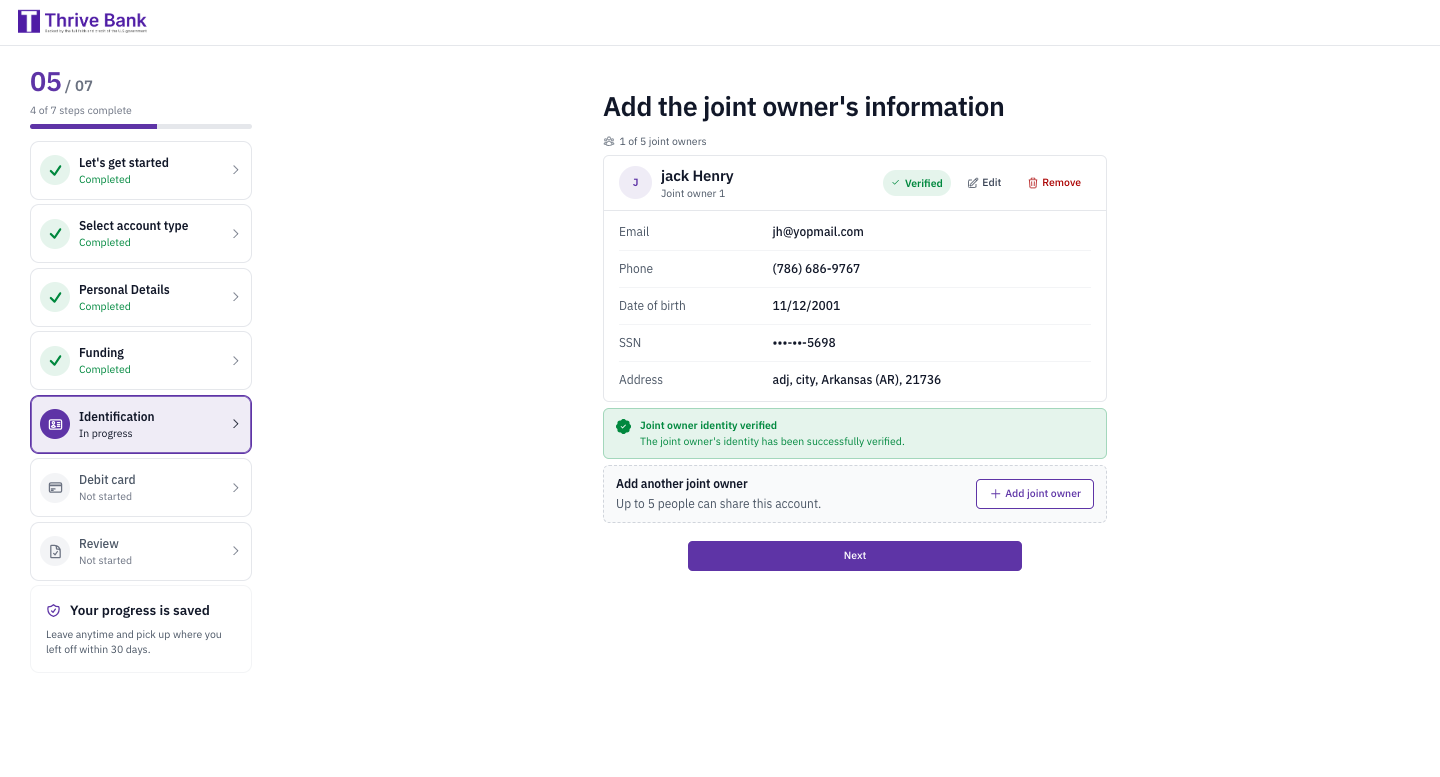 The joint owner’s badge shows the result of the check:
Once a joint owner is verified, the applicant can edit or remove them, or add another. Up to 5 people can share an account.
6. Debit Card
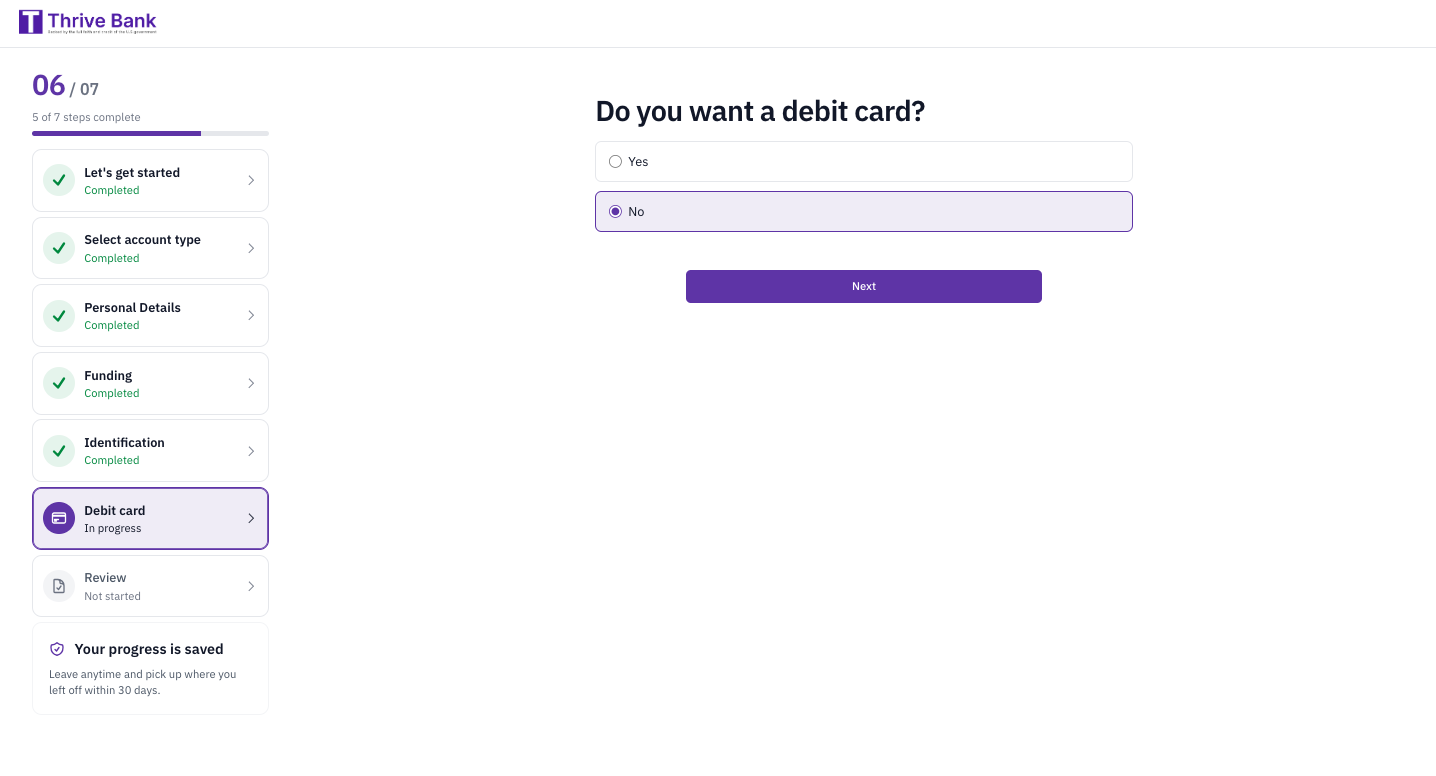 The applicant chooses whether to request a debit card with the new account. The preference is passed to the institution along with the application, and it can be changed on the review screen. This step is skipped for savings accounts.
7. Review
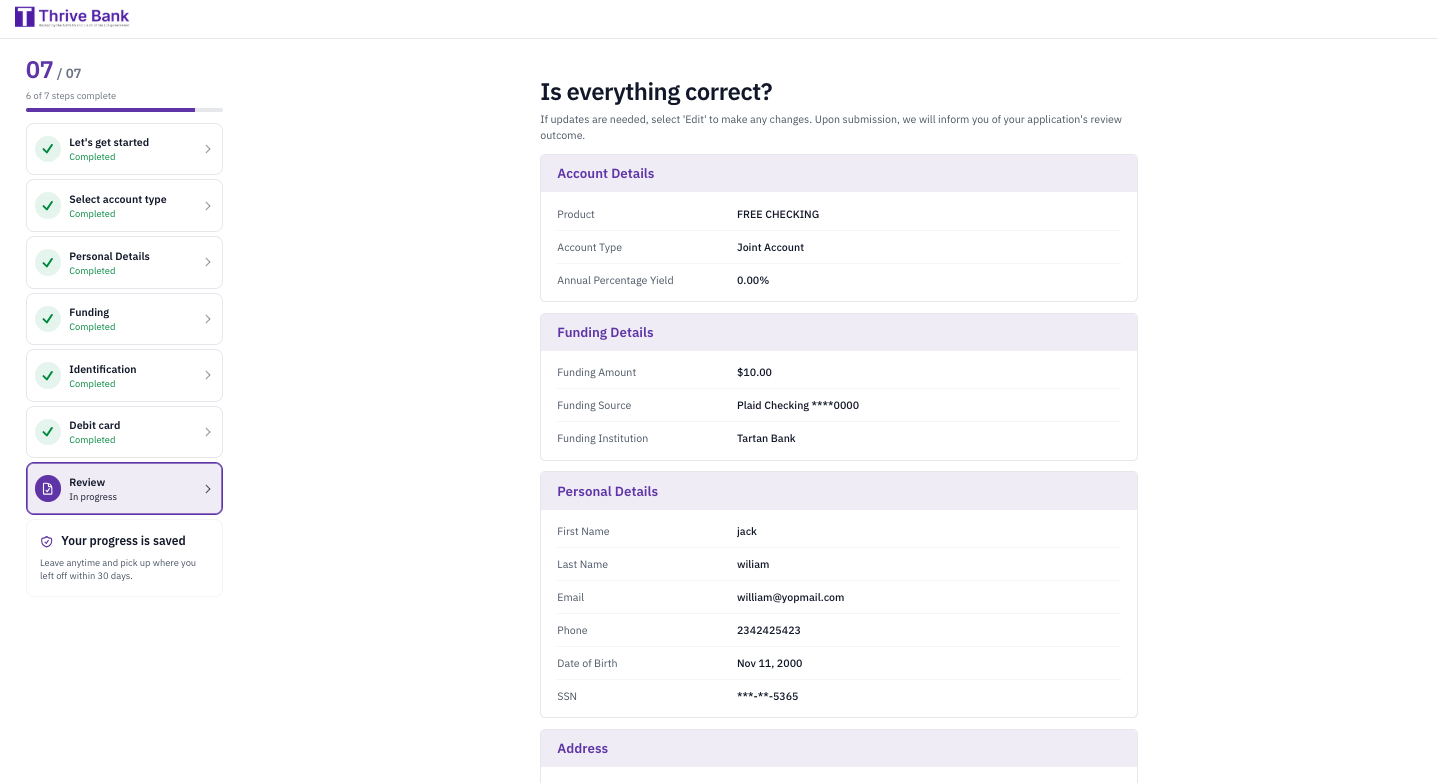
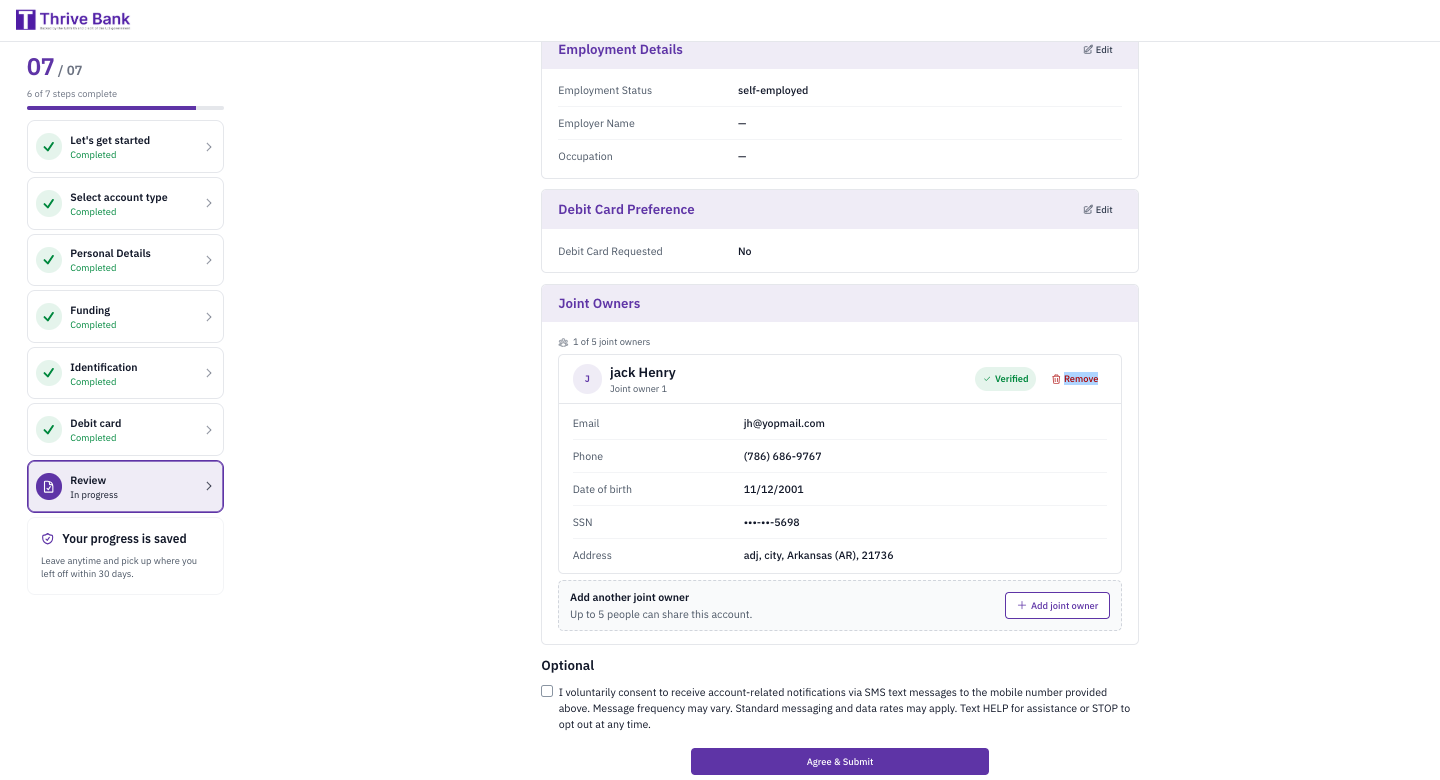 Before submitting, the applicant checks everything they entered:
Employment details, the debit card preference, and joint owners can be changed directly on this screen, without going back through the earlier steps.
An optional checkbox lets the applicant consent to receive account-related notifications by SMS text message at the mobile number they provided. It is not required to submit.
The applicant selects Agree & Submit to submit the application, and is then informed of the review outcome.
Account Opened
When the application is approved, the platform opens the account at the institution’s core banking system and transfers the opening deposit from the linked bank account. The applicant sees a confirmation with the new account number (masked), account type, date opened, initial deposit, APY, and interest rate, along with each account owner marked as primary or joint.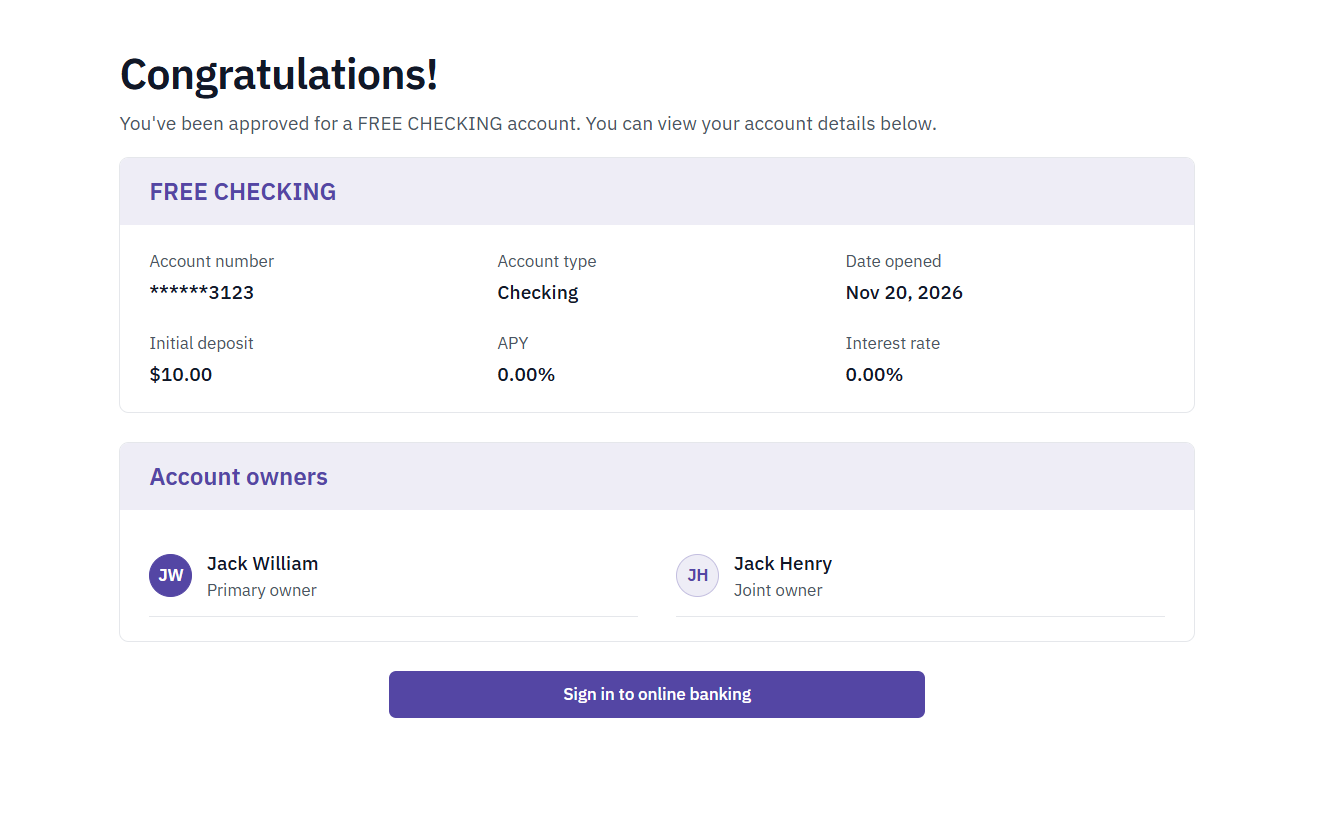 The applicant selects Sign in to online banking. They are signed out of the application and taken to the Q2 online banking login page.
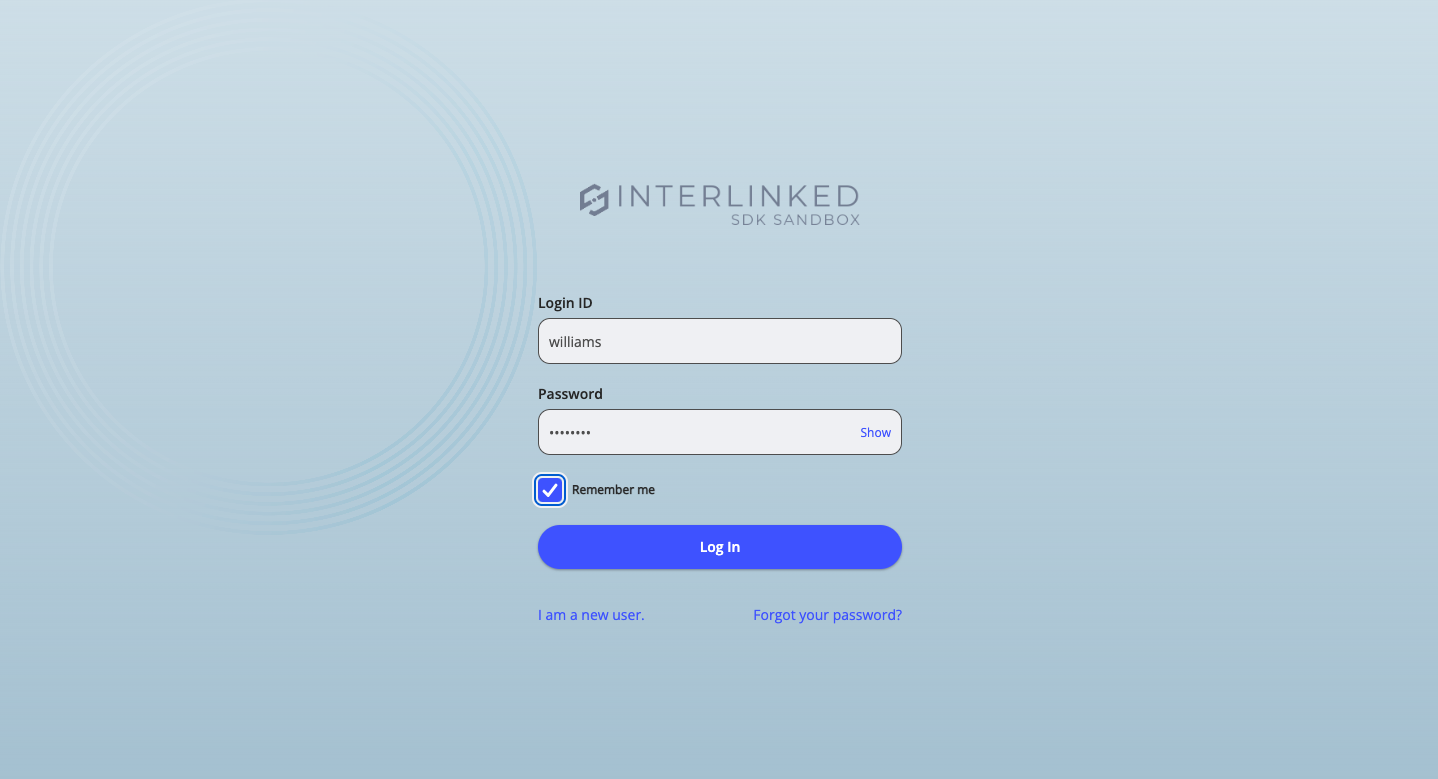 The applicant signs in with the login ID and password they created in the first step to see and use their new account.
Returning Applicants
An applicant who signs in again with the same email address is taken to the screen that matches where their application stands.Application in Progress
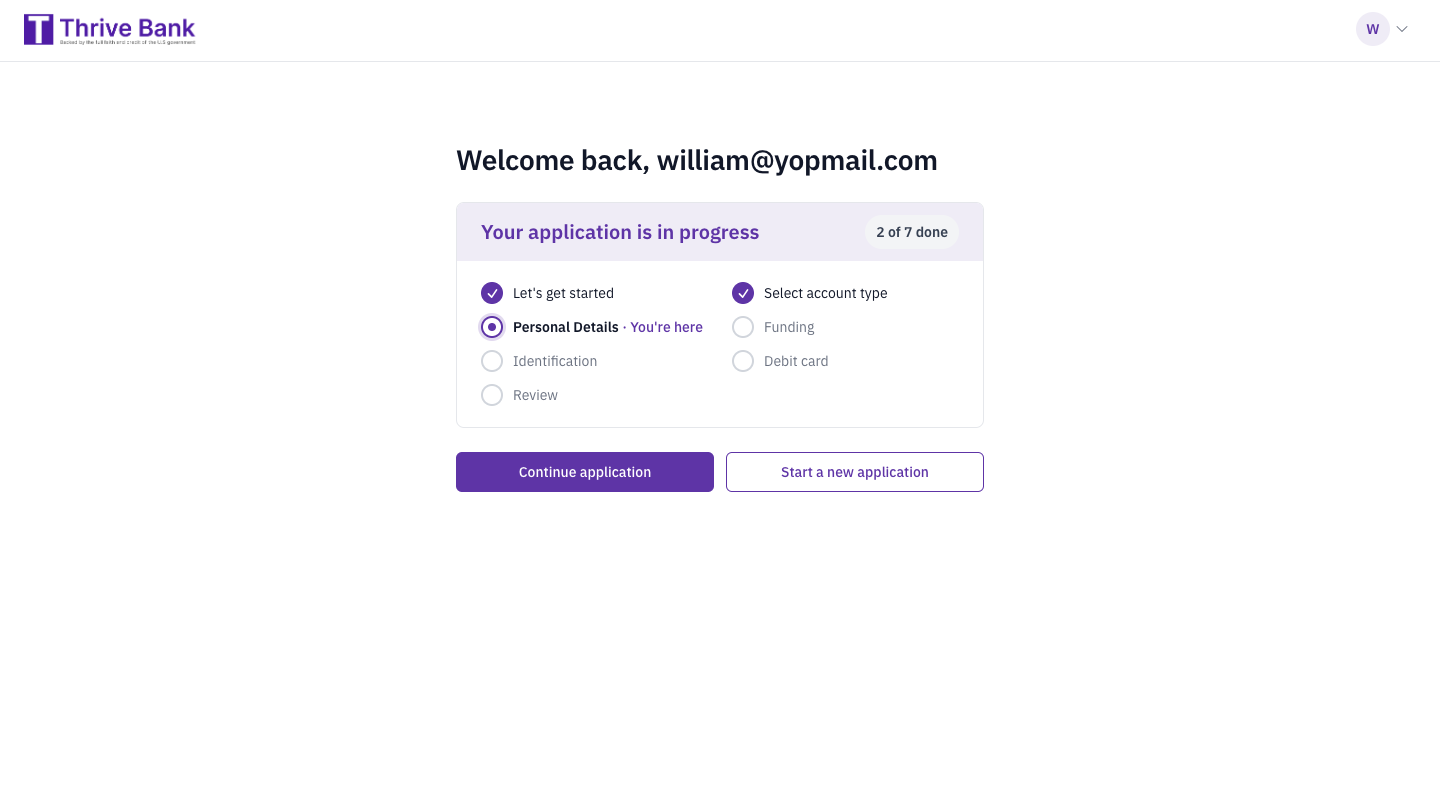 Progress is saved after every step, and applicants can pick up where they left off within 30 days. The applicant sees Welcome back with a checklist of the steps, the current step marked You’re here, and a counter such as 2 of 7 done.
Continue application returns them to the step they left off on. Start a new application closes the current application and begins again, and is not available once the application has reached the review stage.
Account Already Open
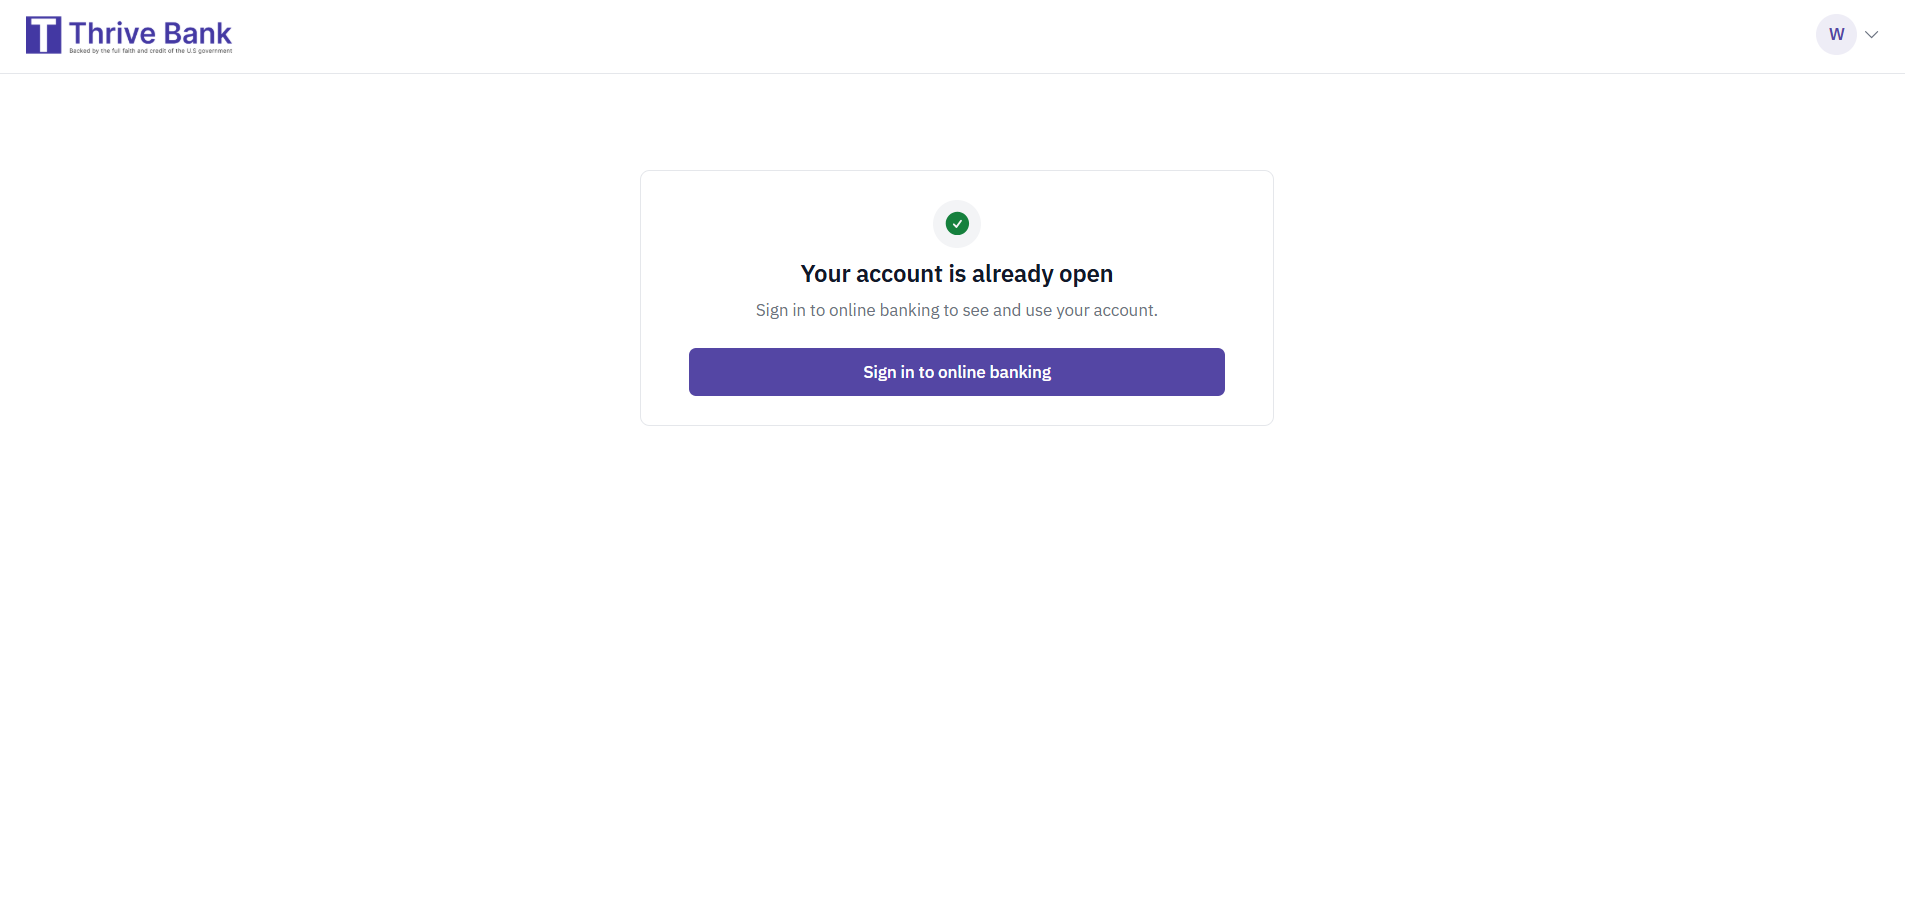 An applicant whose account has already been opened sees Your account is already open. No new application starts, and they sign in to online banking to see and use their account.